How to Camouflage Your Gun (and Almost Anything Else) with Mossy Oak Graphics
Bill Miller 02.23.15
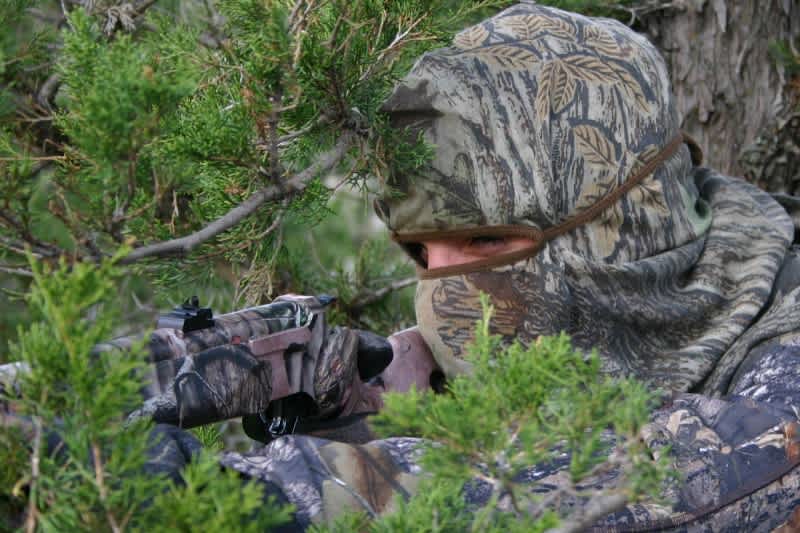
Over the course of my hunting career, I’ve gone back and forth on whether I should treat my firearms as works of art to or simple tools to get a job done. Truth be told, I own guns that fall into each category. But my field guns are all tools; part of a system meant to help me get as close to game as possible and ultimately make a clean, one-shot kill. In every case in which I’m trying to get the game to come to me, it’s imperative that the gun blends in with the background.
There are many ways to accomplish this. I’ve tried most, including taking the dull-finish duck boat spray paint to shiny guns that fell well into the “tool” category. But those days are over thanks to MossyOakGraphics.com.
For less than $25, you can order one of their pre-cut kits and put a camouflage finish on any gun. It will look great and stay in place as long as you want it to. So here’s how you can camo up any gun in about an hour if you sweat the details, and in 20 minutes if you just need to cover up a shiny tool!
1. Order a kit from MossyOakGraphics.com. You can choose from a dozen different Mossy Oak patterns for any terrain or situation.
2. Watch this video.
It’s about 10 minutes long and very detailed. By using what you see in this video, you’ll be able to cover your gun like a pro. The first one will take you some time to get just right, but you’ll gain speed as you gain experience.
 3. Safety first. Be certain your gun is unloaded.
4. Disassemble your gun. Take it down as far as you feel comfortable. The farther you can take it down, the easier the job will be.
5. Degrease all external surfaces. Use rubbing alcohol or a specific product like Outers Crud Cutter. Pour the chemical onto a cloth or paper towel and thoroughly wipe all areas to be covered. Wipe dry and allow some time to air dry, too.
6. Cut apart and dry fit the precut pieces. They are roughly shaped to the corresponding parts of the firearm. This will give you any idea of how to best position the vinyl when you actually apply it.
7. Remove backing from vinyl and lightly lay it down. This is where the true beauty of the 3M technology Mossy Oak Graphics uses shines through. You can lay down the camo and pull it up as many times as you need to. You can even fold it over onto itself and pull it apart again if you mess up. It will still adhere to the surface.
8. Use a razor knife to precisely trim the vinyl as necessary. Be careful not to mar the surfaces of the gun with the knife. Save the scraps you trim off as “fillers” in case the precut pieces don’t precisely align with the contours of your gun.
 9. Finally, use the squeegee that comes with the kit to apply pressure to the vinyl only when it’s positioned to your liking. The pressure activates the adhesion that sticks until you want it to come off. I’ve hauled my guns with Mossy Oak Graphics vinyl in place through all kinds of conditions and temperatures, and it stays put.
Should you want to remove the camouflage, just heat and peel. Simply use a blow dryer to heat up a seam or corner, get your knife blade under the vinyl and pull away. There’s no residue and the surface of your gun looks exactly as when you put the camo on it!
These gun kits are the most basic of Mossy Oak Graphics products. The same technology applies and works equally well on a larger scale for about anything you can imagine—all the way up to and including trucks, trailers, and even boats!

 Tip of the Week
The Mossy Oak Graphics work on just about anything, but you won’t need to camo your ThermaCELL. The field version of the ThermaCELL is available in several camo patterns, including RealTree. Exactly the right option for spring turkey, goose, and bear hunting!

These insights brought to you by Federal Premium Ammunition, ThermaCELL, Camp Chef, and the Quebec Outfitters Federation.

Bill Miller’s least favorite question is, “What is your favorite kind of hunting?”
He dislikes it so much because any answer may hint he’s willing to give up one or more of the lesser favorites. But if you press him really hard, his answer will be, “I really like anything I can hunt with a shotgun and over good dogs.”
At an early age, Bill became shotgunning addicted. Instead of an allowance in cash money, Bill earned shotgun shells for his chores around the family home. Then on Sunday afternoon’s he would haul an old Trius Trap out to the field behind the house on to the make shift “trap range” he’d mowed into the tall grass with the push mower. Then his dad would join him to supervise the shooting of the shells earned during the week.
About the same time, at age 11, Bill figured out he wanted to make his living experiencing outdoor adventures and sharing them with others. He wanted to be an outdoor writer. In the decades since, he has lived and continues living his dream.
He travels widely enjoying adventures close to home as well as on five continents. He shared his adventures on national networks hosing and producing shows for NBC Sports, Versus, Outdoor Channel, Wild TV, Sportsman Channel and others. He appeared on ESPN for 13 season on "Shoot More, Shoot More Often." During the production of “The Shooting Sports” for ESPN, Bill was honored to shoot frequently in the company of members and coaches of the USA Shooting Shotgun Team.
In 2012, participated in the Armed Forces Entertainment Outdoor Legends Tour to Afghanistan to entertain men and women serving in the military -- in his words, "...it was the greatest honor in my career and a life changing experience. His latest venture is a new book, "Reflections Under the Big Pine" he co-authored and published with K.J. Houtman.
