How To Evaluate a Rifle Scope
Tom McHale 08.26.19
You can find great scopes that cost several thousand dollars. You can also find great scopes that cost a few hundred. Of course, there are plenty of options in between too. So, how do you know what you’re getting? The specs on the box tell part of the story, but not all.
Part of the reason that scopes vary so much in price is the quality of the glass. Two scopes can have identical specs, but if one has outstanding glass, and the other doesn’t, you’ll see huge differences in clarity and brightness. Or rather, you won’t see so much at all through the cheap one. The other challenge with scopes is that much of the “quality” is internal. You can’t fully test them until you mount it and shoot.
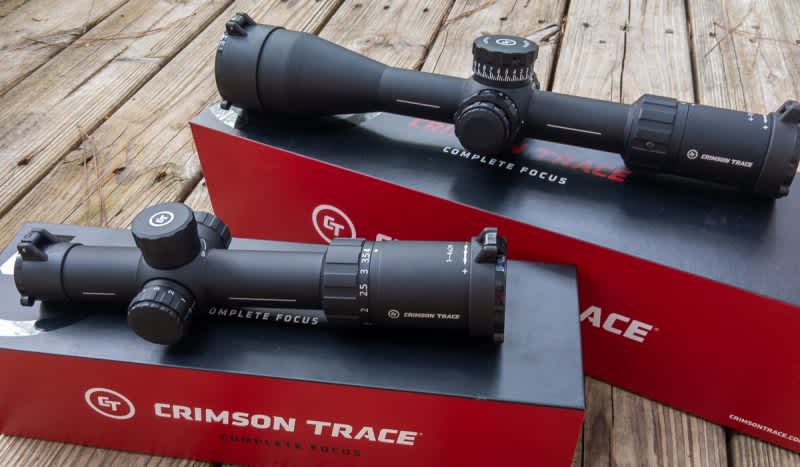
I’ve got a new scope from Crimson Trace that that I’ve been wanting to run through its paces. It’s a CSA-2416 4-16×50 with an MSRP of $749. That falls squarely in the medium price range so it should be a solid performer. Let’s find out.
What’s the Focal Plane?
This model is a first focal plane scope. That refers to placement of the reticle within the body of the scope. In a first focal plane scope, the reticle is “in front of” the magnification, so the reticle changes size along with the target as you increase the power level. First focal plane scopes are generally more expensive to make and therefore carry a higher price tag. The benefit is clear. If you use the reticle hash marks for holder-over or determining range to target, you can perform those functions at any power level. With a second focal plane scope, the reticle size is fixed, and hold-over and ranging functions are only accurate at one power level, usually the highest.
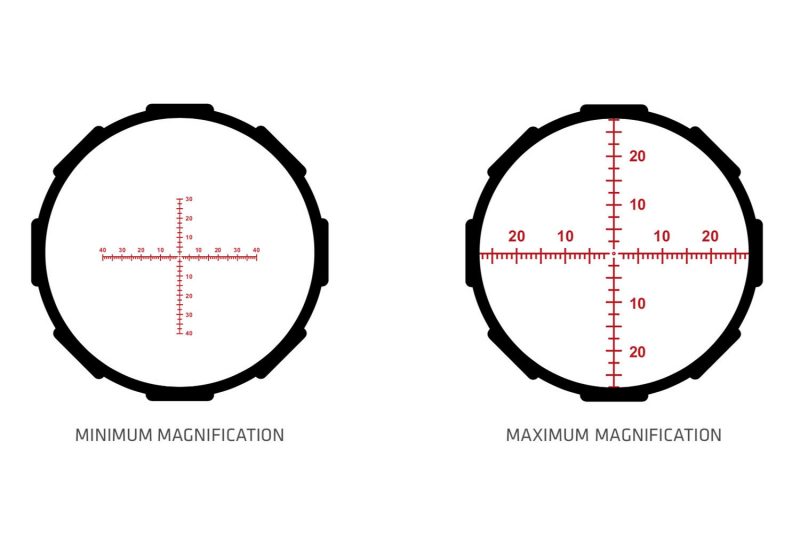
The MR1-MOA reticle in this scope uses vertical hash marks spaced 2.5 MOA apart. At the lowest 4X power setting, the crosshairs are clearly visible, but you won’t be able to use the graduations. That’s OK because at distances appropriate for 4x they won’t be relevant anyway. When you increase power to about 6x, the reticle grows large enough to clearly see the hash marks, so at any level beyond that magnification you’ll have no problem holding over. When the reticle is fully enlarged at 16x, it fills the screen and you can see about 35 MOA in each direction. The proportions are good. The reticle is sized for a good balance between high and low magnification use.
Exit Pupil
For purposes of explaining this topic, we’ll play a bit fast and loose with optical science. Part of the job of a scope is to take in a picture of what it sees, magnify it, stick a reticle overlay in place, and send it straight to your eyeball in a clear and digestible format. You might think of what comes out of the “eye” end of the scope as a cylinder of light containing the image. The diameter of that cylinder is called the exit pupil.
Here’s the thing. Your eye hole is only so big. While your pupil expands and contracts depending on how bright the ambient light conditions are, it’s generally optimized to accept an incoming “tube of light” in the 4mm to 6mm range. Ideally, the scope will output its light to match that size exactly. If what’s coming out the back end of the scope is too small, you’re not getting as much useful image information as your eye and brain can process. It will also be harder for you to “find” that beam of light so you can see a clear picture. Scopes that are over-magnified for their objective lens size sound good on the spec sheet but can be a disappointment in the field.
Fortunately, it’s really easy to figure out what a scope’s exit pupil specs are. Just divide the objective (front) lens diameter by the magnification level. The more you magnify, the smaller the exit pupil is. So, using the Crimson Trace CSA-2416 4-16×50 as an example, if you have the magnification ring at its lowest level of 4x, the exit pupil is 50mm divided by 4x, or 12.5. If you crank up the magnification to 16x, then the exit pupil shrinks to just 3.125. That’s not bad, but it is less than your eye is capable of handling.
There’s a lot more to the topic than we can cover here, but a basic understanding can save you a lot of frustration down the road. A scope with a tiny exit pupil will be less clear and bright and a lot more finicky to line up on target. The smaller the exit pupil, the more precisely your eye must align with the center of the lens. You’ve probably seen some scopes where it’s difficult to find and center the image at high magnification settings. Understanding the exit pupil concept can help you avoid that scenario. The CSA-2416 is forgiving on that front. The objective lens size and maximum magnification are in sync, so the image is clear and bright even when you’re zoomed up to 16x.
Clarity Testing
Most scopes look good in bright light conditions. What separates the winners from the losers is the optical quality in lower light conditions. If you hunt, this is where your scope has to work well, in dawn and dusk hours. Be sure to try looking through the lenses at different magnification levels inside the store or inside your house where the light level is lower. Is the image still clear and detailed?
Another thing to check is the image clarity on the border of the circular field of view. Is the image as bright and crisp near the edge as in the middle? How about as you change magnification? To see this effect, try a couple of different scopes side by side that have similar objective lens and magnification specs. Make sure one is a high-quality model and the other closer to the budget end. Once you look through high-quality glass, you’ll be spoiled for life. The quality of the lenses is the main reasons that scopes with seemingly identical specs can vary so much in price.
This new Crimson Trace model is solid on both fronts. I can detect no degradation near the edges of the viewable area and it’s clear in lower light. It does have an 11-setting illumination feature which lights the entire reticle, not just the center aiming point.
Mount First
Before you do any live fire testing, it’s critical to make sure the scope is mounted properly. There are two components of mounting that can affect expected point of impact and shot-to-shot consistency.
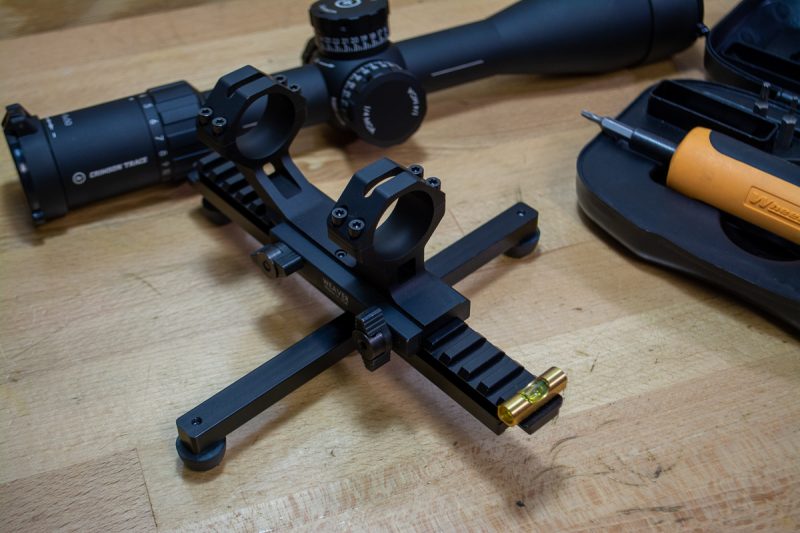
First, make sure that the scope is precisely level relative to the receiver. To do that, I use a nifty tool called the Scope Setter. This device allows you to mount the scope in the rings while ensuring a perfect ring base to scope orientation. Once scope rings are tightened, you move the whole assembly to the rifle receiver. It works like a champ. This is important because any slight cant can send shots unexpectedly to one side or the other. Of course, when shooting you have to make sure the whole rifle is level too.
It’s also important to make sure the scope is mounted with the proper torque. Too much damages the scope tube and too little can allow movement during recoil. Ring manufacturers will specify settings, usually in the 20 inch-pound range give or take, for the screws that mount the scope inside the rings. There are different torque settings for the ring-to-receiver mount, so check manufacturer recommendations on those too. If you own multiple rifle and scope combinations, it pays to invest in a torque wrench like the Wheeler Engineering FAT WrenchWheeler Engineering FAT Wrench to make sure tensions are correct.
Adjustment Consistency
While you can test clarity and exit pupil in the store, it takes a range visit to really see what a scope can do. A good scope has to provide predictable and consistent windage and elevation adjustments. When you adjust up 10 minutes of angle using the turrets, that bullet needs to hit exactly where you expect. When you bring it back to your zero, the scope needs to “remember” that exact setting. You should be able to fire one shot at zero, make a massive adjustment for a longer shot, and when you come back to zero, the next shot should land right where the first one did.
I like to test a scope’s ability to adjust and return to zero using a box test. This scenario verifies a couple of things. First, if I make a significant mil or MOA adjustment, I should be able to predict where the bullet will land on target. This tells me that the turret adjustments correspond to true MOA measurements. Second, it verifies that the scope can return to its proper zero after significant adjustments.
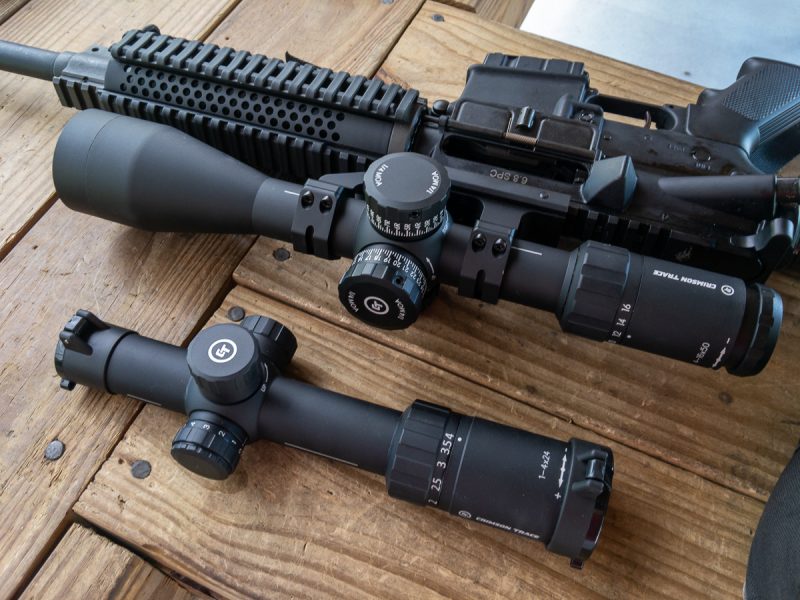
I mounted the Crimson Trace CSA-2416 4-16×50 on a Rock River Arms 6.8 SPC rifle. When firing hand loads tipped with 110-grain Sierra Matchking bullets, the rifle shoots sub-one-inch groups at 100 yards so its accurate enough to verify scope operation.
I first fired two shots at the center of the target from a range of 100 yards. As you’ll see in the photo, I did adjust the scope a hair off the point of impact so I wouldn’t shoot out my aiming point. Then, I made a five MOA adjustment down and a five MOA adjustment to the right. Holding the original point of aim, I fired again. In theory this will define the lower right corner of the box, five inches below and to the right of the first shots. Next, I move 10 MOA straight up to shoot the upper right corner, then 10 MOA left, and 10 MOA down. These shots complete the four corners of the box. Last, I adjusted the scope turrets back to zero and fired two more shots.
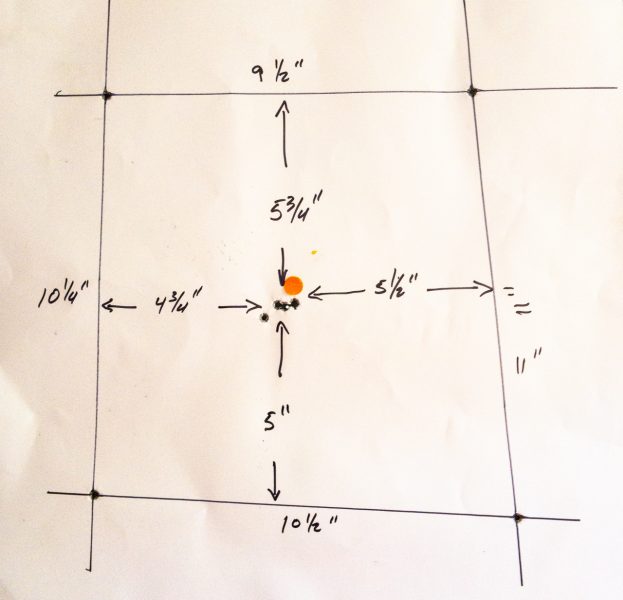
If all is good with the scope, I should have a perfect square, 10 inches per side. Given the ammo groups into an inch, it’s natural for the shot impact points to vary a half-inch or so in any direction. I should also see that the last two shots in the center are in the same group as the first two shots.
This scope shot a very solid box and the last shots returned right back to the initial points of impact. If you check out the target picture, you’ll see that all impact points fell clearly within the margin of accuracy for this rifle and ammo combination.
Subjective Observations
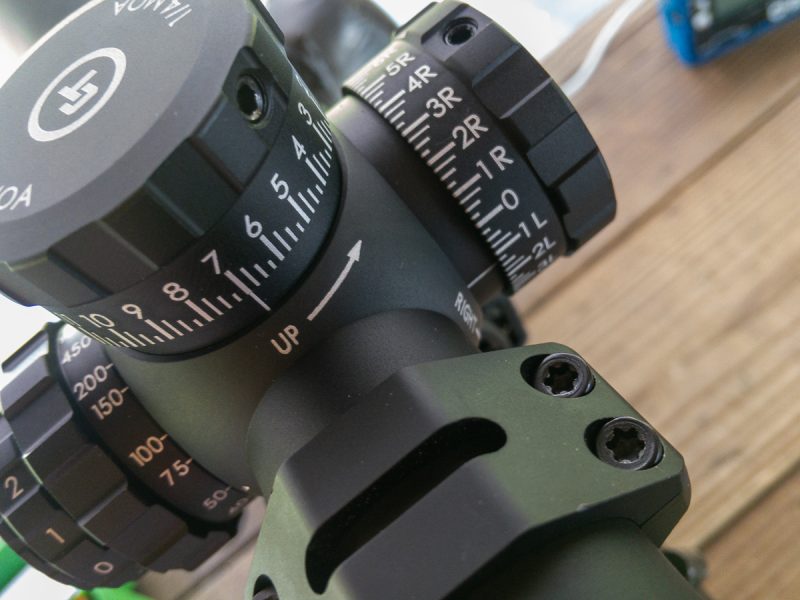
This scope uses exposed target / tactical turrets and a detailed graduated reticle. For quick shots, you can hold-over for any required windage and elevation adjustment. If you have more time, you can use the turrets adjustments and hold on the center crosshairs. Each click of the turret yields a ¼ MOA adjustment and each complete rotation adjusts a full 25 MOA. The clicks are distinct, but I wish there was more tension on the turrets. They are a bit easy to move inadvertently. There is also not a “hard stop” zero feature that you often find on higher-end scopes, so you must keep track of your rotations if you pass a complete revolution.

There is one more interesting feature on this scope. The parallax focus wheel on the left side goes all the way down to 10 yards, so this scope will also make a solid air rifle optic.
All in all, this turned out to be a quality rifle scope. For an estimated street price of a bit less than $600, it compares very favorable for first-focal plane scopes with this feature set.

