How To Use Milliradian-Adjustable Scopes
Sniper's Hide 07.14.11
Telescopic sights adjustable at the Milliradian level have become common in recent years. The experts at SnipersHide.com examine these new optics in detail and explain how to use them.
Over the last 2 years we have seen a big increase in the number of scopes that offer their adjustments in Milliradian. I am personally a strong proponent of the use of Mil adjusted scopes with Mil based reticles. I find the graduations to be the right distance for both precision and tactical use, feeling we are all familiar enough with Mil Dot reticles to have a basis for understanding how to move forward with Milliradian based adjustments. The problem for most is the need to assign a value in the same way we assign a value to everything else in our lives. The biggest question most struggle with is, “how much is that at X yards in Inches?” Well the easy answer is, you don’t need to assign a linear distance to it because the angular measurement works so well. In fact, what you see is what you need; it’s really that simple. A Mil is a Mil whether it is 100 yards, or 686.792 yards, the number is the same.
A Brief Background
Before we get started down this road, I need to go over a few numbers related to using a Mil adjusted scope. Now, over the years there has been some confusion in how to term a Mil adjusted scope. For the record, it is not a “Metric” scope or calibrated in meters, nor does it require conversion to yards. By definition a Radian is, “the angle subtended at the center of a circle by an arc that is equal in length to the radius of the circle.” So, a Milliradian is 1/1000 of a radian. When applied to a circle the number we use is 6283.2, and while it has been taught and discussed at length that the number is 6400, that is not correct for a riflescope. Our scopes are calibrated using 6283 and only one scope on the market was ever built using the wrong number, that is the Leupold M3A, who’s reticle is based off the 6400 number… don’t let that fool you, the number we use is the true number of 6283, just because someone did it another way, or has taught 6400, doesn’t mean they are right either.
Now, because a milliradian is 1/1000 of a radian, it doesn’t matter what linear distance you use is, the reticle or adjustments subtends 1/1000 of that number. So you have a milliradian equaling:
- 1 mile at 1000 miles
- 1 meter at 1000 meters
- 1 yard at 1000 yards
- 10 centimeter at 100 meters
- 3.6 inches at 100 yards (3600 inches)
Most scopes adjust in .1 MRAD or 1/10th a Milliradian per click, so this allows the shooter to break up the space between each Mil Dot 10 times for an easy corresponding adjustment. The only exception to this I am familiar with is again, Leupold who uses a .05 adjustment. However for us, we will stick to .1MRAD-adjusted scopes as it makes for an easy transition. There are scopes that have their turrets marked as 1 click = 1cm at 100 meters, which is correct, but it also equals .36 per click at 100 yards. The manufacturers are trying to fulfill that need for a linear number. Lately many of the companies have reverted back to the correct marking of .1 mrad per click. This is the point we want to strive to reach, so that we can break a Mil based reticle down into 10th so we can accurately use the reticle and match the adjustments on our scope.
That should tell the shooter all they need to know. There are all sorts of math associated to this, and for those who want to dig deeper, at the end I will provide links for you to further explore the numbers behind this, but for the most part, this is all we need to know to get started. There is really no point in confusing yourself if you don’t have to. Stick to thinking a Mil is a Mil regardless if we hold or adjust, no matter how close or how far.
Know Your Scope
Moving forward, we now have a Milliradian adjusted scope with .1MRAD clicks, and we have a Mil Based reticle, so what else do we need? What we need is to understand how our scope works, whether or not the reticle is located in the First Focal Plane or the Second Focal Plane. Now, both have their advantages and disadvantages based on their use and the user, but for the most part I recommend the First Focal Plane Scope (FFP) over the Second Focal Plane (SFP) scope. The reason being is I want my reticle sub tensions to be correct on every power within my zoom range. With a SFP scope the reticle only correctly subtends at 1 power, and I highly recommend checking to confirm that power on your own. Using the numbers the above you can find out which is the correct power by lining up the Mil Dots to intersect either 3.6” at 100 yards or 10 centimeters at 100 meters.
So, the first thing we are going to do is zero our new scope. We get in a nice position behind the rifle, obeying all the fundamentals of marksmanship and we shoot the best 3 shot group we can at the center of the target. Looking through our scope after shooting this group we ask ourselves, “How much adjustment do I need”? I know a lot of people like the sight in targets with the squares that are either a ½” or 1” so you know how much to adjust your scope, and right now you are saying we need to convert to figure out what .1MRAD means at 100 yards in inches, right? Wrong, we don’t care how many inches anything is, we simply look through our scope and read the reticle. This is key because learning to read a Mil Dot reticle to the 1/10th of a Mil will pay huge dividends down the road. This you will see again.

Reading the reticle I would estimate the shot group is 1.3 Mils Low and 1.9 Mils to the right of center. This would mean we need an adjustment of 13 clicks if we spoke in that terminology, but since we don’t we need 1.3 Mils up and 1.9 Mils Left to get this group in the center. That should be the end of the process, in fact you can even zero a scope faster if you like, but this method works very well. Remember, we are breaking up the space between the centers of the reticle to the center of the Mil Dot, not the edge, as that has a value too. Most Mil Dots are .2 Mils wide, but check your manual or online schematic at the manufacturer’s website as they could be .25 mils wide and in the case of Hash Mark type reticles even less as you need to account for the thickness of the reticle when reading a mil based scope.
Next we want to shoot at distance and you are saying, “all my dope is in MOA so how do I figure out what to use for 200 to 1000 yards”, which is a good question. If you have numbers for your rifle and your previous scope was adjusted in MOA we have a conversion you can use to keep your same dope only converted to Mils.
To convert your current MOA values to Mils divide the MOA by 3.438 and that will give you the Mils to use. For example if you use 8 MOA at 400 yards you would use 2.3 Mils at the same distance. Do this before you hit the range then simply read your range card in the same fashion as before, only now instead of needing to remember your dope from 0 to roughly 38MOA you can now do it only needed to count to 12 Mils. This same principal goes for windage. There are plenty of charts available to have you windage in Mils like found in the logbooks from Storm Tactical, not to mention the use of ballistic calculators.
Matching your reticle and scope to your adjustments
Now that we have the scope zeroed and we have our dope converted to Mils we are ready to start shooting. The key to using this system in a more efficient way is to be able to read the reticle and understand it matches exactly to your turrets. There are two schools of thought in long range shooting, well I am sure there are many schools of thought, but what I am referring to involves the Wind. There are those who dial their windage, and those who hold off for their windage. Both have their advantages and disadvantages, however for the sake of this conversation we are going to address them the same way.
Whether you hold or dial the number is the same. What you see in the reticle is the exact number you can dial or hold your windage regardless of range. 100% of the information necessary to hit your target is presented in the reticle for a follow up shot. If you have an unknown distance target that you hastily estimate to be 750 yards away and you estimate the wind hold to be 1 Mil, once you fire that shot observe the impact and make the correction. Sounds easy right? Well providing you are straight behind the rifle and you drove the rifle through recoil you should be able to spot your own impacts. If you observe the shot on the UKD target to be 2 Mil low and 2 Mils from the center that is your correction, which could be both dialed or held to correct for. This greatly reduces the time it takes to follow up the shot and greatly increases the accuracy of the correction because you “read” the correction in the reticle.
If you are accustom to dialing your changes, and adjustments its just as simple. If shooting a KD course and the target rises from the berm with a spotter in it, simply read the correction from the spotter to the center of the target and dial the correction exactly like you did at 100 yards. This is where the ability to read the reticle to the 1/10th of Mil plays an important role so that your reading will match your turret adjustments with greater accuracy.
To take this application a step further when used in conjunction with a Mil Reticle equipped spotting scope the shooter will become even more effective by working in one system receiving his corrections in Mils rather than a conversion of Mils to MOA or worse in the distance away from the target based on an estimate of size. You have a calibrated ruler in your scope it’s best to use it to your advantage. In advanced cases a shooter can work with another shooter to use two rifles where the second rifle can engage the target with the correction before the first shooter even reloads providing the first shot is coordinated. Speed is increased two fold along with accuracy thanks to unifying your adjustments.
The Future is Now
If anyone hasn’t notice we are progressing at leaps and bounds in the opening years of the 21st Century. Now we have hand held weather meters, ballistic calculators along with Laser rangefinders to assist in making the shot. Gone are the days of having to determine the long hand of the bullets’ drop and figure how that relates to our scopes adjustments. Today the easiest way to begin is to input your bullet’s caliber, weight and muzzle velocity along with some basic environmental conditions into a ballistic calculator and out comes a spread sheet providing the drop in Mils, wind holds in Mils, and Leads for Moving targets in Mils. It can be mixed and matched to suit your needs, but the flexibility is amazing. There are free online calculators that are extremely effective or you can invest in a hand held PDA with a ballistic program to store and retrieve information for all of your rifles.
The ballistic programs I recommend are from Nightforce with the ExBal engine, Patagonia’s LoadBase 2.0, and Lex Talus’ Field Firing Solutions. All run off a Windows Mobile device and all will allow you to customize the software to match your needs. The best part is they have options to exactly match the scope and reticle you are using. So the output can be tuned to give your scope even more information making you that much more effective.
The golden rule with any PDA based program is, garbage in, garbage out. Using the tools available to get yourself the best information possible is necessary. It is highly recommended you shoot every yard line recording the data to match your rifles characteristics to the output of the ballistic calculator. There is no substitute for rounds expended in practice and training. These programs can not guess what you are using, they must be tuned to your rifle and load and each have a method of “tweaking’ the results to match your rifle downrange.
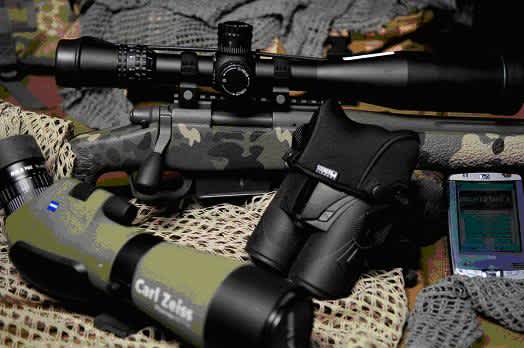
As I mentioned above, you also have the ability to use Spotting Scopes and Binoculars with Mil Reticles inside to make calling corrections easier by matching your scopes’ reticle. I personally use a Carl Zeiss 65* spotter with a 30X Mil Dot Reticle, however several companies offer reticles at much more reasonable prices. US Optics also offers a spotter with their scope reticles installed to make the decision even easier. For those who don’t want to haul a spotting scope and tripod around, Steiner now makes several models of their Tactical Binoculars with reticles. Steiner calls them the SUMR, or Steiner Universal Mil’ing Reticle. Be sure it is the SUMR reticle and not the artillery based Military Mil Reticle.
Below are a list of links to help understand the Mil, but I recommend avoiding them whenever possible so not to add another layer of confusion if you can help it. Over the last 30 years there have been some serious misconceptions put forward that remain in print today. Myth and legends in shooting grow daily, especially with the advent of the internet, so Keep it Simple and you’ll find you’ll be a lot more effective that way.

Owner of Sniper's Hide online, graduated the USMC Scout Sniper School at Stone's Bay in 1986. Deployed as part of the 24th MAU (SOC) participating in Operations Earnest Will & Praying Mantis.
Works as a contract instructor as well as having competed in many tactical matches across the country. Sniper' s Hide currently hosts two Tactical Competitions a year, the Sniper's Hide Cup and the Shooter's Bash.
I continually seek outside training and methods to improve my skills. The more tools I can add to the toolbox the better.
