A No Plucking Way to Dress Out a Whole Turkey
Northeast Notebook 06.13.12
The old saying is that there is more than one way to skin a cat. Well, there is more than one way to dress a turkey. Some folks just pull the breasts off and leave the rest of the bird for the coyotes, but that seems wasteful to me. When we roast a whole turkey, whether it is a Butterball or wild bird, the breasts make the main course of at least one meal and most of the remaining meat gets used for turkey sandwiches the next day and the bones are stewed into stock for future use as turkey soup. A small turkey will provide a dozen servings if you count the turkey soup, which means four full meals for my family of three. I like the taste of turkey too much to let that many meals go into a coyote if I can help it.
I want to utilize as much of the bird as possible. But I have childhood memories of plucking enough chickens on my grandparents’ farm so that I grew to hate the smell of hot wet feathers. It was never a pleasant smell to start with. But throw in an association with burned fingers and an unpleasant job and you create a general distaste for the experience. I am more than willing to give up the turkey skin in exchange for not having to dip a bird in hot water then pluck it. My way to dress out the bird is to skin them, and here’s how I do it.
After your turkey is down and you have a chance to give thanks and have filled out your tag, you can bring the bird home whole so long as you plan to get it dressed out and chilled within an hour or so. If you don’t have access to refrigeration then you need to butcher and cook your bird as soon as possible.
Find a sharp knife, a clean work area, and a garbage can with a liner. I recommend doing this job outdoors with some newspapers on a table so that after you are done you can roll up the papers and dispose of the entire mess without making your kitchen smell like the inside of a turkey.
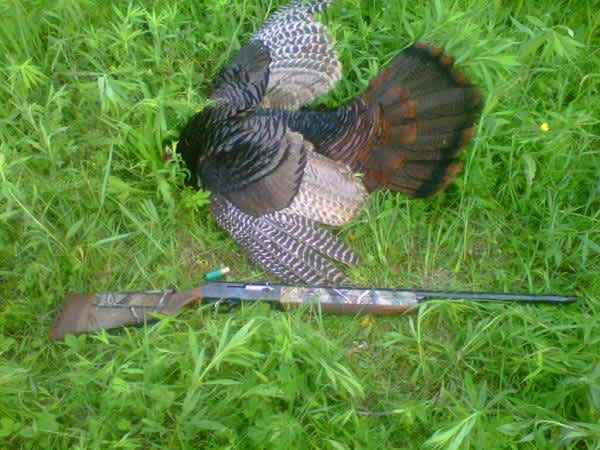
If you want to preserve the fan, wing feathers or spurs for mounting, remove them before you start butchering. If you don’t want to pursue taxidermy with your bird then just leave those parts and pieces on the carcass and proceed. You can wear latex gloves to protect your hands from the smell of the carcass. I find it just as effective to apply hand lotion or moisturizer just before butchering. This fills the pores in my skin and seems to prevent the scent from lingering after I wash up. Vaseline, Bag Balm, or even A&D ointment will work if you don’t happen to have any moisturizing hand lotion.
Lay the turkey on its back on a flat surface on top of the newspapers. Keep the garbage can handy. Feathers will come off and you will want a place to throw them. Grasp a turkey leg near the foot and bend the joint. Feel for the weak spot in the leg joint that separates the feet from the drumstick and cut around the joint where the bones come together. If you feel an opening between the bones as you work the joint back and forth go ahead and slip your knife into the joint and cut anything holding the bones together. If the joint doesn’t pop open for you, twist it sideways until you can see an opening between the ends of the bones. Slice into that gap and separate them. Remove the foot and discard into your scrap heap. Repeat with the other leg.
In a similar way, remove the last two sections of wing. I remove the last two sections of wing because it makes skinning easier, but some folks think it is worth saving that middle section and only remove the most distal section of the wing.

Once you have removed the feet and wing tips, lay your turkey on its back. Part the feathers and make an incision near the highest point in the center of the breast bone. Anywhere easy to reach is fine. Don’t get hung up on finding the exact center or highest spot. When you can get the tip of your knife under the skin, begin to peel the skin back. Slice between the skin and the flesh to separate them when needed, much of this can be done by just pulling the skin away from the bird like peeling off a shirt. As you work toward the belly, be careful to avoid cutting so deeply that you puncture the gut.
At no time should fecal matter or stomach contents touch your knife or any part of the bird that you intend to eat.
When you work the skin off each side of the breast and belly, continue down the thighs and ribs and along the wings and legs. As you get down the legs and wings, you can split the skin but it is just as easy to pull the bird out of its skin like pulling your arm out of a sleeve.
Cut the tail from the body at the base of the tail. Continue to remove the skin from the bird’s back and you will end up with the skin and feathers attached to just the bird’s head. Sever the neck and remove the head with all skin and feathers attached. Discard them into the trash.

You are now left with a whole skinned bird. The only thing left to do is to remove the guts.
Place the bird on its back again with the neck away from you. Carefully cut around the anus so that it is free of the bird and held in place only by the end of the intestine. Now puncture the membrane at the base of the breast bone allowing access into the gut cavity. Be careful not to cut into the guts. Lay your knife aside and reach inside the body cavity as far as you can and get hold of something solid in there (it will probably be the gizzard) and pull the guts out toward you. Just reach in and pull out everything that looks like something that you don’t want to eat. Let all of this fall into your trash can and go back for the rest including the windpipe and esophagus.
 At this point I carry the carcass to my garden hose and rinse it inside and out removing any stray feathers or blood. Don’t be afraid to flush out the inside. You don’t want anything that’s in there which the water could wash away. Let the bird drain a moment then take it to the kitchen sink where you can either rinse it again in a clean sink, or submerge it in a large kettle like a 6 quart canner. A soak in icy salt brine is optional.
Then your bird is ready for either the oven or the freezer. I have found that by separating the drumsticks, I can usually get a whole butchered turkey in a 2 gallon freezer bag. I think it is worth double bagging to preserve the game you worked so hard for. Failing that you can wrap it in freezer paper and tape. That’s it! Your bird is now freezer ready!
The only remaining task is clean up of your work area and knives. That’s it. You have just butchered your thanksgiving dinner. If you try skinning your turkey, let me know. We’ll do another blog entry on the best way to cook them later in the year!


My family and I live and hunt in upstate NY between the Catskill and Adirondack mountains, but also occasionally hunt in Vermont, New Hampshire, Pennsylvania, Maine, Washington, Alaska, and Namibia.
I have several hunting stories, magazine articles, and product reviews in print and am always looking for something that further improves the experience in the field or a chance to get out there.
I chase grouse, turkeys, geese, white tail, bear, mule deer, and moose whenever I can get a tag. I have been blessed with the opportunity to hunt from Alaska to Africa. And my son is a new hunter who I have enjoyed small game and bird hunting with as well. Through sharing his hunts, I am in tune with a new hunters perspective as well as the somewhat more experienced view I have. I try to stay up to date on the hunting regs and news in general but especially in the North East. I have a several decade long interests in historic firearms and have taken deer with a variety of military surplus rifles. I cast and reload for a variety of tools from flintlock to mil surp and I'm always eager to learn something new! I look forward to hearing from my readers and learning from them too.
