How to Have the Perfect Backcountry Shooting Trip
Edward Osborne 12.05.14
There are lots of ways to shoot. If you don’t like the cold, there are indoor ranges. If you don’t like the noise, there are outdoor ranges. If you want to chat guns and hang out, there’s usually one local range where “the cool guys” shoot. And when you don’t want to talk to anyone, breathe fresh air, and focus on the trigger pull, there’s the backcountry.
A shooting trip off the beaten path can be more work than most range options, but it’s also one of the most rewarding. With the right mindset and the right equipment, it doesn’t have to be a circus show, either.
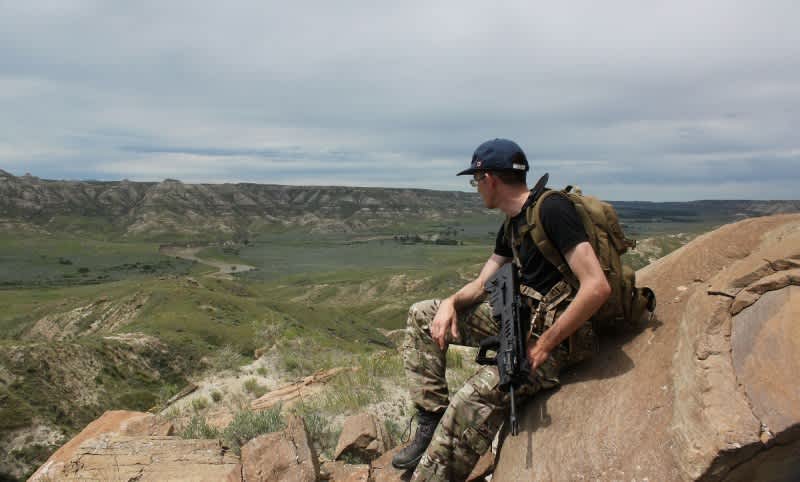
Backcountry shooting is my favorite kind of trip, bar none. I like spending time out on the trails, like the feel of carrying a rifle, and love the solitude to focus on myself and my firearm.
You will need:
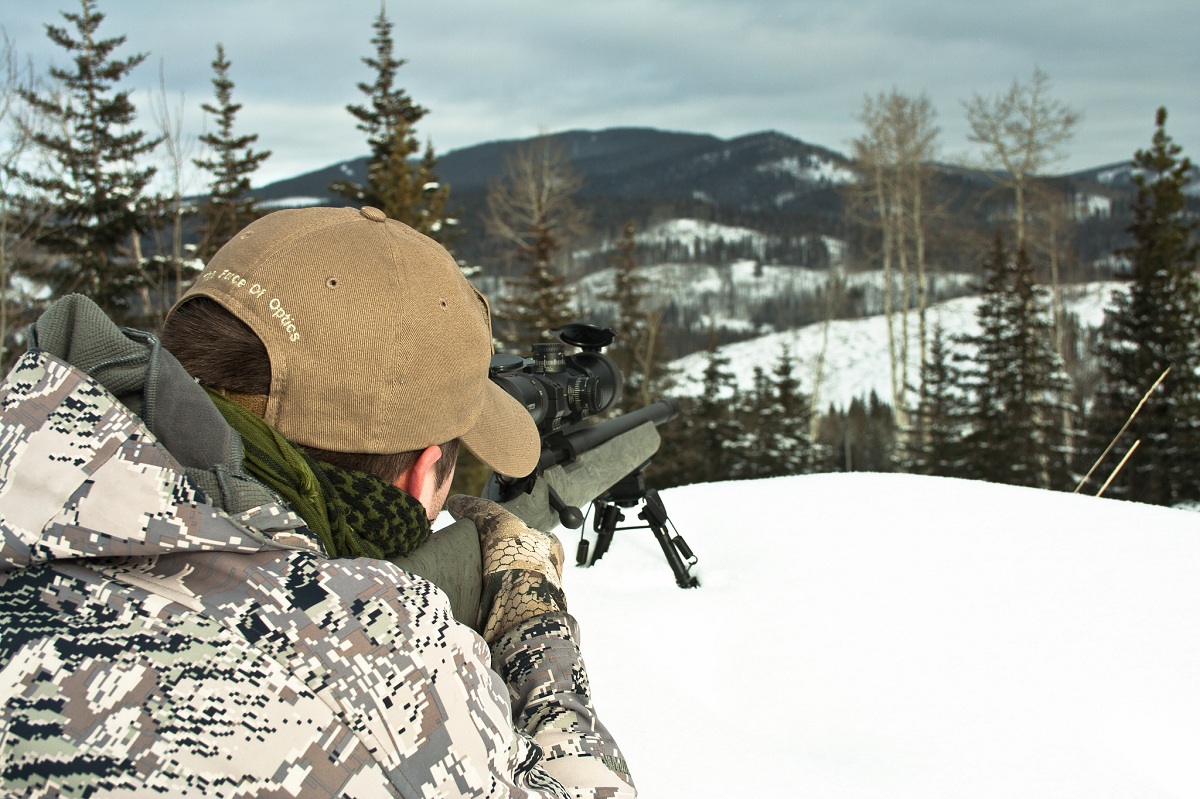
- Your gun. I’ve done various trips where I carry multiple guns out there, and sometimes it’s nice to have variety. But I shoot my best when I’ve got one firearm, one load, and time to focus on that specific setup.
- Targets. You want something to shoot! Whether it’s just a paper grid or a full AR500 steel, be prepared to carry it. I’ve experimented with a few systems explained further down.
- The right place. This can be the hardest to find, but the most rewarding. The secret here is to be willing to walk. Which leads me to the final requirement.
- To be reasonably fit. You don’t need to be a triathlete, but if you want the best experience you have to be prepared to carry some ammo and gear over some hills. There is a huge difference between the people who will walk a few kilometers, and the guys who will drink beers and shoot cans out of the truck bed. We may share the same parking space, but we have very different mentalities.
Possibly the most important part of that mentality difference? Take your trash with you. I really can’t emphasize this enough. When you’re way off the beaten path, you might be the first human in years to put your boot on that spot. Don’t leave crap behind. The biggest priority here is your target material, of course, but you’ll likely have snacks on you that produce garbage. It’s also worth thinking about a brass catcher if you’re burning through a few mags.
Where to go
This can seem like the hardest part. But fortunately it is one that gets easier with time. First, find an area where it is legal to discharge a firearm. Whether this is a buddy’s back 40, or federal hunting land, make sure it’s not a wildlife refuge. I like to find a place within 40 minutes drive of my home, but I’ve been known to go as far as three hours for the right shooting spot.
Once you’ve identified a zone that’s close and legal, it’s time to find your range. Look at topo maps and sat images at home before you leave, and identify three or four potentials to check out. The key thing you’re looking for is open hills or valleys. Bring binoculars and a GPS to make your first trip a scouting trip. After that, it’s all about exploring and how far you’re willing to walk to see what’s around the corner.
There are three key things I consider to decide if a given clearing is safe for shooting.
- Is there a back stop? One of the fundamental firearms rules is to know where your bullet will go after it passes through your target. Place your targets at the base of a hill for 100 percent certainty that lead is going to burrow into dirt when your first miss goes high.
- Is there a clear line of sight? Shooting through tree cover sucks, and can be a safety risk. If your natural range is more of a natural obstacle course, you probably need to look elsewhere.
- Are there routes that people or animals might come down? You might think you’re alone in the backcountry, but that’s never a guarantee. Keep an eye out for offroad vehicle trails, hiking paths, or anything else that might deposit a person into your arc of fire. This is part of why a good line of sight is important. I draw an imaginary 90-degree cone out from my shooting position, with the target in the center. Any trails in there? Might be worth a second thought.
If you’re really the cautious type, and need a little extra peace of mind, you can print little high-visibility warning tags in case someone comes your way. I’ve been hanging them up for years, along with an attached whistle, but never had anyone use them.
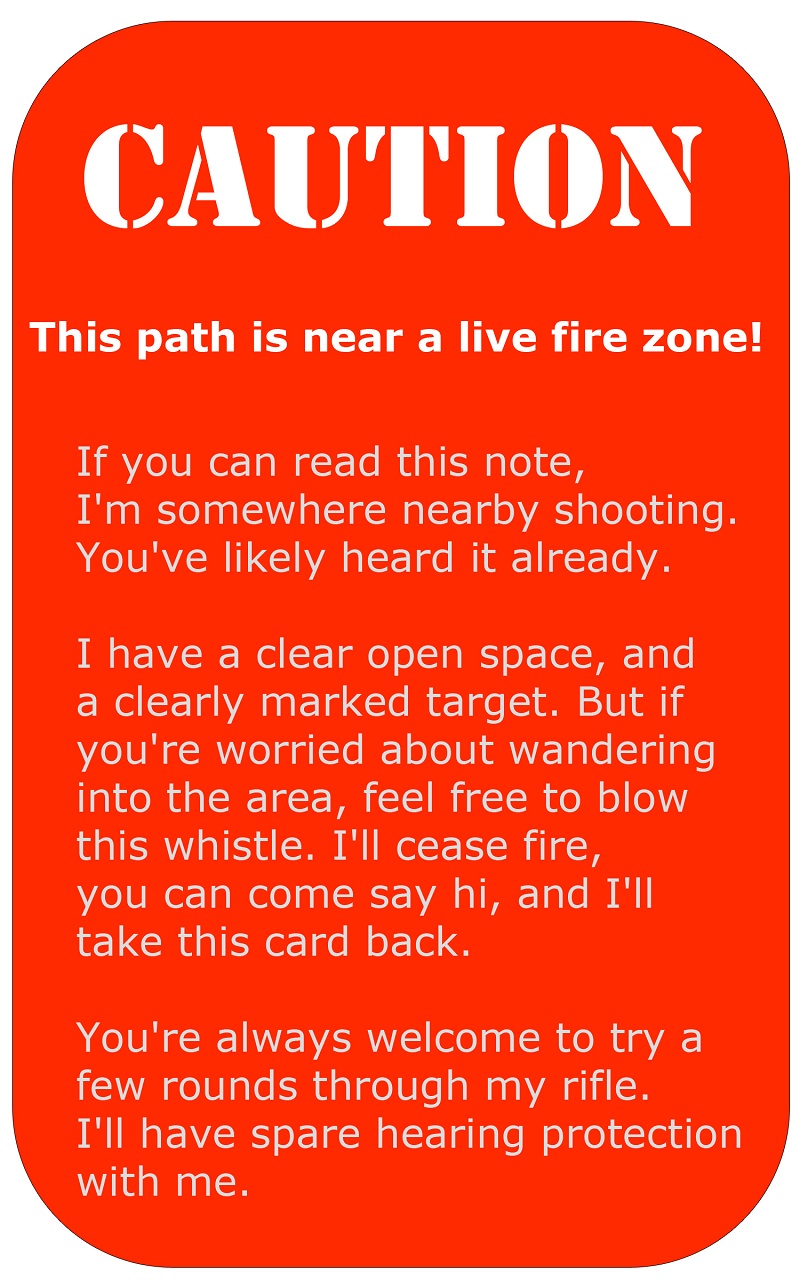
Feel free to save it and use it yourself, should you feel so inclined.
This might seem silly, but it can be the difference between “that asshole blasting away in the woods” and “a fellow sportsman enjoying the outdoors.”
When you shoot outside the range, you are an ambassador for the shooting sports. I’m always prepared to explain what I’m doing, what I’ve got, and why it’s legal to anyone who’s curious. If you know your area, you should have a good idea of who may or may not stop by. But even if you think you’re all alone, there’s always the chance that someone else with a similar ambition is out there, too, and it’s a small thing to be considerate of them.
Choosing what to shoot
Over the years I’ve been shooting in the backcountry, I’ve adopted two systems for hanging targets. One is lightweight, the other more substantial. The lighter system means using a length of aircraft cable, a roll of duct tape, and paper targets. The idea is once you’re out there, you find some trees, suspend your cable, then tape up your targets.
I’ve experimented with paracord instead of the thin cable, but paracord can lead to a lot of movement if you’ve got any wind.
The secret for keeping your paper targets “safe” is to get a cardboard poster tube for hauling them out there. Any other method and they inevitably get crushed or crinkled along the way. If you’re extra clever, you hang your roll of tape off the bottom edge of the paper to hold the target flat and reduce wind movement.
This system is easy and saves weight, but limits where you can shoot. You’ve got to have the right location with trees and a backstop within range of your cable. Sometimes that means awkward shooting positions because of the angle your trees are on, or having to shoot at slightly off distances like 186 yards instead of a nice, even 200.

The other drawback is, depending on your optics and caliber, you’ll be doing some walking to check your targets.
The alternate system gives you more options on where your targets go, needs less back-and-forth walking, but involves a lot more weight. It involves steel targets.
I like shooting steel. It rings when you hit it, and doesn’t need replacing. I have an eight-inch square of AR500 steel that I hang using a collapsible target rack.
There are a few companies that make target stand brackets, but I chose the Ultimate Target Stand Brackets from Gear Head Works. Two brackets fit one-inch pipe as legs and a crossbar, and have a cross slot cut for 3/4-inch chain. You’re using the weight of the steel to keep things together—no screws or joints. The entire system can come apart easily and collapse into a backpack with the legs sticking out the top.
I got my AR500 plates from Zombie Supply Canada, but there are lots of steel manufacturers around. Choose someone close to you, because shipping is expensive. I like eight-inch plates because they help keep the weight down, and always use AR500 because I like my targets ricochet-free and long-lasting.
But if that sounds too heavy to carry, don’t despair. From my first expeditions I have learned a few tricks to lighten the load. First, I only take a single steel target these days! Instead of chain, I hang my steel with thick rubber bungee cords (these can take a stray bullet or two without dropping the steel) and I use PVC pipe instead of electrical conduit for legs. The cross bar is still proper pipe, but only two feet long to support the single steel.
You’re under 25 pounds with that setup. Some overloaded hunting packs will weigh more than that!
The other option that’s always fun when off the beaten path is binary explosive targets. These are only one-use targets, but that also means you only have to carry them one way. Keep fire conditions in mind when placing them, just like the label warns. I usually carry one or two with me to round out the day.
Target shooting in the wilderness can be more work than a regular range trip, but it’s a diverse and challenging experience too. Outdoor trips can be all-day affairs if you plan them right, and generally it’s worth bringing a meal with you. Even when the temperature drops, and there’s snow on the ground, I try to get out regularly to enjoy the outdoors and sharpen my shooting skills.

As a Canadian firearms owner, my brushes with freedom have been sadly limited. I love the outdoors, black rifles, and trying to figure out how our laws work up here. I try to blog, photograph, and video as much of that as I can. I have a soft spot for Israeli and Czech firearms, especially the civilian versions of their issued rifles. I've been in the firearms industry for a long time: my first job in High school was picking up hulls on a trap range, but currently I work with night vision.
