Five Steps for Tackling Target Panic
Cheaper Than Dirt! 03.14.13
Target panic is more than a problem–it’s a disease. It can strike anytime, anywhere and anyone. If you haven’t been bit the target panic bug yet, your time is coming. Perhaps that last statement is a bit of an overstatement, but you get the idea of the seriousness. The good news is target panic is not only curable it’s preventable.

The problem
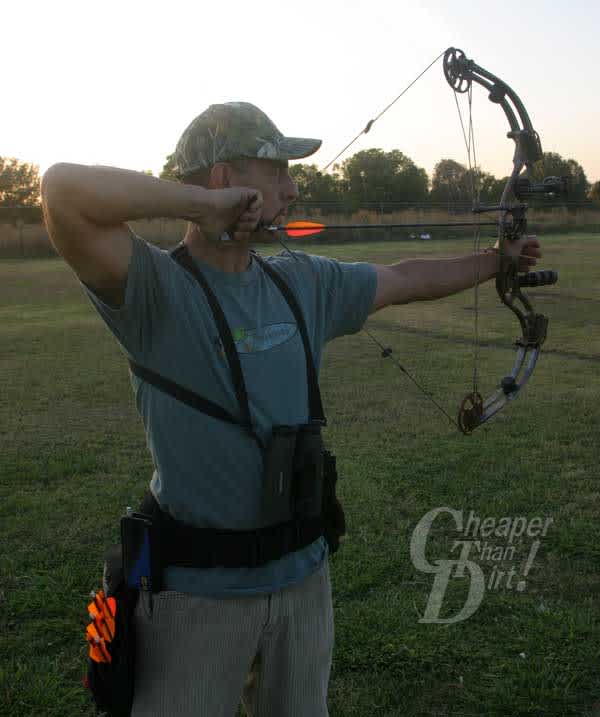
Target panic is the inability to hold your sight on the target without causing a panicked release. For some, the panic induced can be so great that they cannot physically release the arrow. While this is certainly extreme, it happens. For others, it feels as if moving the pin to the center is impossible, like someone was physically pushing against you.
Some shooters can be described as rock steady, and in truth while many of these archers will have sight pictures with less movement, they will still have movement. Don’t fret, movement is natural, but misunderstood. When asked, most of my students have stated a belief that the movement was caused by their arms. This can be the case when over-bowed or with certain debilitating diseases.
However, you could have arms like Arnold and your sight picture would still dance like an epileptic. The arms are not the cause, they are the symptom. Your strength comes from your midsection, the abdominal muscles. Weak abs allow your upper body to sway. The arms are just trying to catch up, but that is what the archer sees so they associate the movement with arms. The good news is, while we could all benefit from a few sit ups, sit ups are not the solution.
The solution
The cure and prevention for target panic are really one in the same, so let’s examine the steps you should incorporate into to your regular training regimen to beat target panic and improve your shooting at the same time.
Step One: Crank down your bow to its lightest setting. If you are not a proficient bow mechanic, go to a local pro shop and ask them for advice. For traditional archers, you’ll simply have to grab a lighter bow.
Step Two: Get close. I’m talking real close to your target—something in the range of five or six feet.
Step Three: Since you are so close to your target that you can’t miss, you do not need to see. Now if this were a movie this would be the part where the old master blindfolds the unwilling student and somewhere lurking in the background would be a beautiful maiden. This isn’t a movie, so we do not have to go that far.

Ideally, you would look at the target close your eyes and then draw, hold for a few seconds and then shoot. This causes some students a bit of apprehension, so keep your eyes open until you draw and are on target.
Shooting with your eyes closed is going to have a couple of benefits. First, there is no panic because your brain is not stressing over aligning the sight picture. This has a secondary benefit, because you do not expect to group your arrows. In fact, grouping is bad. You are so close that it would be easy to start tearing up your arrows, so be sure to move your shots around the target.
The second benefit is muscle memory. When you put your key in the ignition of your car you do not typically have to bend over and line it up, nor search for the hole—unless you think about doing it first. As long as you let your subconscious handle the operation, your finely-honed muscle memory will hit the hole every time, only your conscious memory can miss.
Shooting with your eyes closed is known as blind bale shooting and trains your muscles to “feel” the perfect shot. This happens because the brain is denied its primary sensory input (vision) and has to rely on its other senses. So in essence, it learns to feel a good shot.
Step Four: This is likely the easiest and most difficult at the very same time. From a close distance, and while aiming at a large target, you’ll draw and aim at the target. Once on target, count for three or four seconds before letting down. That’s right, we need to train your brain that it is okay to hold the sight on the target without the urgency to shoot the arrow.
 Step Five: Cut the center out of your target and not just the 10-ring. If your target has 10 rings, cut out at least nine rings and use an over-sized target for the distance. This isn’t an accuracy contest; it’s a skills-building exercise. Over time, you’ll slowly add rings and incrementally increase the distance.
The time spent on the first four steps will vary with degree of target panic the shooter was suffering, but should become part of your regular training. This is a guide of course and money spent on a quality coach is money well spent. After all, we don’t shoot to cause ourselves stress; we are supposed to be out there enjoying our shooting. Don’t hesitate to utilize the services of a good coach.
One last piece of advice
Don’t get in too big of a rush to go through the steps. You didn’t get target panic in a day and you won’t cure it that fast either. I have known national champions that spent months quelling their target panic. Some beat it and were afflicted again and again. What’s important is that they overcame target panic before it permanently cost them the enjoyment of the sport.
![]()
![]() Check out CheaperThanDirt.com for all your archery needs.
Check out CheaperThanDirt.com for all your archery needs.

