How to Pick and Preserve Wild Mushrooms for Year Long Enjoyment
Randall Bonner 10.23.17
With the bounty of fall harvest season also comes the dilemma of food preservation. When wild mushrooms appear, they usually appear in abundance. Generally speaking, fresh is best, but in the event that you end up picking more than you can eat, you’ll have to find ways to extend their shelf life. Wash your harvest thoroughly and explore these options to figure out what works best for you.
Saute and Freeze
If you have the freezer space, this is by far the best way to preserve the natural flavor and consistency of wild mushrooms. Melt some butter in your skillet and add some fresh cut herbs such as thyme, basil, oregano or rosemary to infuse the flavors in the butter. Cut your mushrooms into bite-sized portions and then toss them into pan with the butter and herbs, as well as some sliced onions. Add salt to taste. Ideally, you’ll want to cook them on a medium heat just long enough to reduce the moisture content of the mushroom and avoid overcooking. Once the onions are transparent, your mushrooms should be fully cooked. Place them in a glass pan or bowl and set them aside to cool. Once cooled, place the ingredients into meal-sized appropriate vacuum sealed bags, or sandwich bags, remove the air from the bag, seal and freeze.
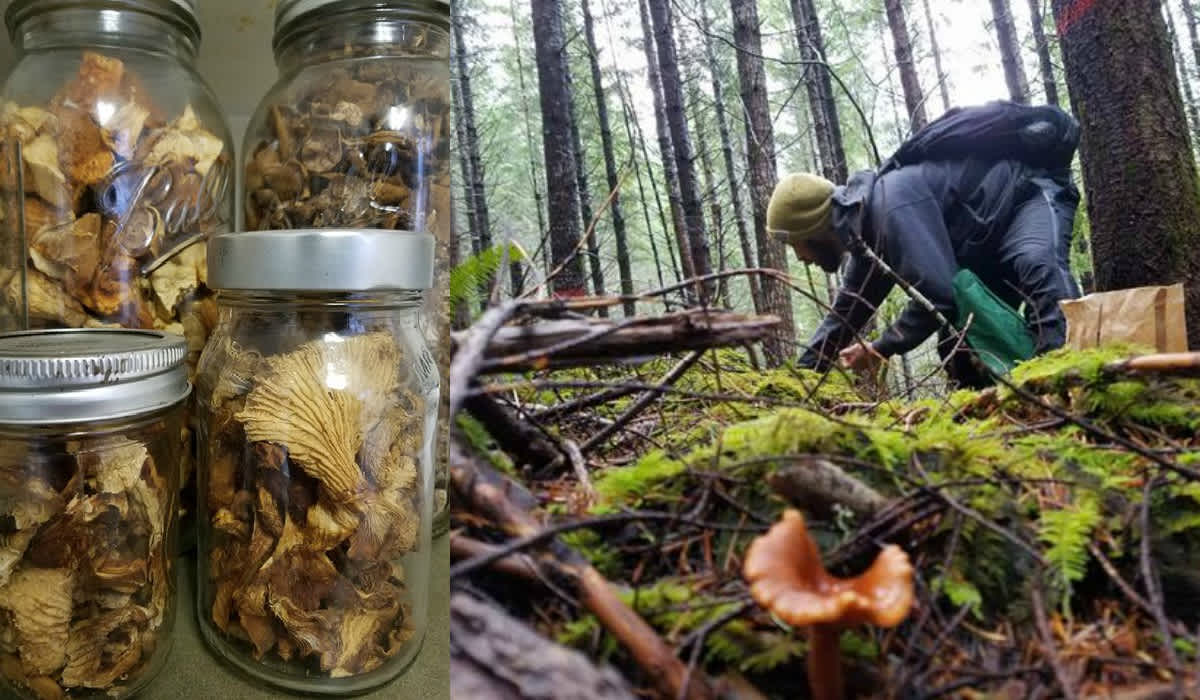
Drying
Preserving the flavor of dehydrated mushrooms is a tricky process, but ideal for smaller varieties such as black trumpets, morels, candy caps (below) and yellowfoot chanterelles.
Place them on trays in a food dehydrator in a manner where they can get air flow around all sides. Heat will reduce flavor. Run your dehydrator on the lowest setting, and if necessary, remove the door or cover from your dehydrator to maintain the lowest drying temperature possible. If working with larger mushroom varieties, slice them into smaller, thin pieces. Leave them to dehydrate, checking their texture until it turns crispy and brittle. Once they’re completely dried, place them in a jar and wait several days for them to continue fully drying before placing on a lid. If you’re low on shelving space, or you simply want to try something different than dehydrating and reconstituting, put your dried mushrooms into a coffee grinder and turn them into powder, which can be used as a seasoning, dry rub, in sauce, stock, etc.
Canning
Dehydrating is simple, easy and doesn’t take up freezer space, but canning is another option that better preserves texture and flavor of meatier varieties such as chanterelles, boletes, hedgehogs, etc. There are a couple of different options if you’re choosing to preserve your mushrooms in jars depending on the canning method. Regardless of the method, the USDA recommends using smaller jars in the half pint to pint size. Cutting your mushrooms into smaller pieces is also universal, but smaller mushrooms can be left whole. Pressure canning is a little more time consuming, but a simple recipe using only the mushrooms and water. Place the mushrooms in boiling water for 5 minutes, then remove and place them into sterilized jars, leaving an inch of headspace before wiping the rims and placing on the lids. Pressure cook at 10 pounds for 45 minutes, adjusting pressure to 15 pounds for higher altitudes.
While pressure canning is simple, pickling and water bath canning is a better way to preserve the complex textures and flavors from wild mushrooms. Pickling will allow you a little more creative license to add herbs and spices to your liking within the jars themselves, also giving the final product more of a visual appeal. There are a few different processes to explore depending on your personal taste. If you’re going for a milder flavor appeal, this marinated mushroom recipe from HealthyCanning.com involves boiling and straining the mushrooms, as well as an element of added oil to the brine to tame the flavors. If you want to preserve the full intensity of the flavors and textures, a dry saute and vinegar-based pickling brine would be a better option. I recommend following Hank Shaw’s recipe at Hunter, Angler, Garderner, Cook. Either way, the water bath canning process takes only 15-20 minutes, adjusting time for altitude.

