How and Why to Use a Tourniquet
Tom McHale 05.15.19

When I was growing up and learning basic skills like CPR, the conventional wisdom and teaching on tourniquet use was entirely different that it is today. At that time, the medical community discouraged tourniquet use because of the risk to the injured limb on the far (from the heart) side of the tourniquet. As an example, if a tourniquet was applied above the knee area to stop bleeding in the lower leg, the big concern was over permanent damage to the lower leg from lack of blood flow to that area.
Since those days, the medical community has done a reversal of “general” recommendations on tourniquet use. Based on field of combat experience in Iraq and Afghanistan, first responders realized two things. First, a serious arterial bleed in an extremity will can cause death in as little as a couple of minutes and loss of cognitive ability in 30 seconds give or take. If the tradeoff is between loss of a limb and death, most people would choose to live without an arm or a leg. The second learning made this tradeoff more of a moot point. Trauma care providers realized that it takes a long time for a tourniquet to cause irreparable damage to an extremity, perhaps as much as two to four hours. That’s a lot of time to get a stabilized victim to professional help.
Why is everyone all hot and bothered about gearing up to carry tourniquets these days? After all, it would be a rare thing indeed if anyone in your immediate circle of family and friends was shot in an arm or leg, causing a potentially lethal arterial bleed. Here’s the thing. While the odds of you being a first responder to a shooting event or accident are very low, the odds of you being the first responder to some other serious injury situation at some point in your life are pretty high. Ever been the first person on the scene of an auto accident? How about a work site injury? Maybe you’re into outdoor sports like hiking, climbing, motocross, or a myriad of other things that involve physical activities and some risk of injury. The list can go on, but you get the idea. There are an infinite number of ways that someone can be cut, broken, or perforated to the point of damaging an artery.
Few if any question the value of learning basic CPR skills. Knowing what to do can and has saved many, many lives. Now, people are realizing that basic knowledge of how and when to use a tourniquet can be equally valuable.
Before we dive into the process of how and when to use a tourniquet, it’s important to note that reading an article like this one is no substitute at all for training by qualified professionals. We will share the process here to provide initial exposure to the steps along with some tips and tricks, so you have a basic understanding of the concepts. Check with your local schools, Red Cross, hospitals, and fire departments to see if there are any upcoming “Stop the Bleed” or similar training opportunities in your area.
When to Consider Tourniquet Use
Although it might be obvious, tourniquet use only applies to arm and leg wounds that are far enough away from the shoulder or hip so that a tourniquet can be applied. Wounds to the torso area require totally different treatment techniques, so we won’t cover those here. Also, for obvious reasons, you can’t stop bleeding in a head wound by applying a tourniquet to the neck!
The primary use case for a tourniquet is to stop an arterial bleed. In the arms, the brachial artery delivers fresh oxygenated blood to the arm and hand. It runs down the interior of the upper arm. In the lower body, the femoral artery serves the same function for legs and feet. Damage to either one represents a very serious injury that can cause rapid incapacitation and death.
While the full diagnostic process is far better communicated in a training class, the rule of thumb is to look for bright red blood (arterial) as opposed to a darker red blood (venous) that’s on its way back to the heart. Spurting blood rather than oozing is another potential sign of artery damage.
A tourniquet can also be a good solution if you’re forced to treat multiple victims. Applying direct pressure to a wound is a good way to slow bleeding, but it you have two or more people to help, you’ve got to find a better way. A proper tourniquet can be applied and “locked” into place, freeing you to help others. We’ll talk about how to do that in a minute.
Tourniquet Application Steps
The purpose of a tourniquet is to squeeze an artery above (closer to the heart) an injury so that blood flow is reduced to the injured area. It’s the same principle as kinking a garden hose to stop the water flow. In the human body, this is generally done by using exterior pressure to force the artery against the bone to provide that “crushing” effect on an undamaged part of the artery.
Before doing any of these steps, and if at all possible without delaying bleed prevention care to your patient, get help on the way.
Two inches “above” the wound
Step one is to figure out if a tourniquet is a viable option. If you have two inches of arm or leg space above the wound, then you should have enough space to apply an effective tourniquet. An injured or severed artery tends to pull back towards the heart. That’s why you need to apply the tourniquet well above the site of the wound itself.
Remove clothing or obstructions
While you can use a tourniquet over clothing like pants or shirt sleeves, it’ll be more effective against bare skin. Any padding or insultation between the tourniquet band just reduces the effect of direct pressure against the artery.
Use a proper width tourniquet wrap
While a tourniquet has to compress flesh enough to squeeze the artery against bone, you have to do so without cutting skin or muscle. Using a thin wrapping material like string, cord, or wire will only cut the skin and may not provide enough compression. Proper tourniquets have straps that are an inch or so wide so if you have to improvise, use something of similar width.
90-degree rule
Be sure that the direction of the tourniquet loop is 90 degrees to the artery in question. The tourniquet should be perpendicular the underlying bone. In most cases, this is pretty intuitive as that’s the easiest way to get it into place.
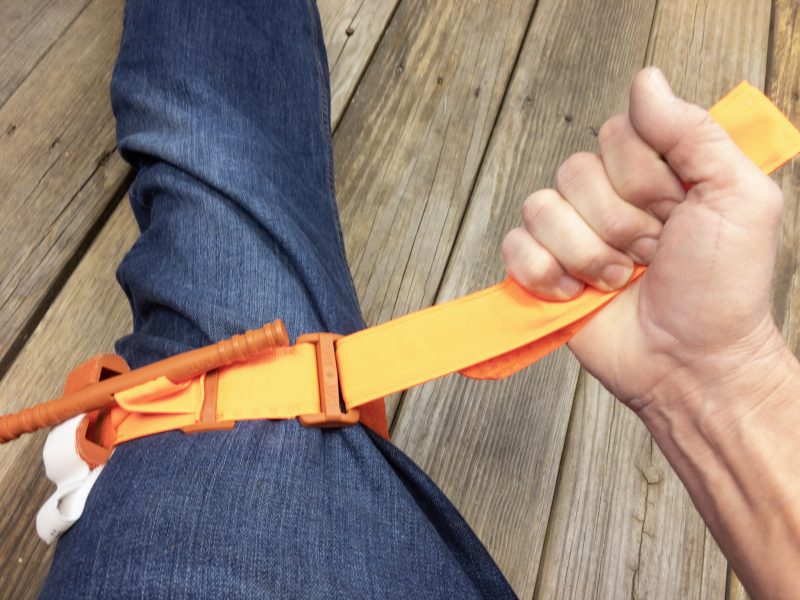
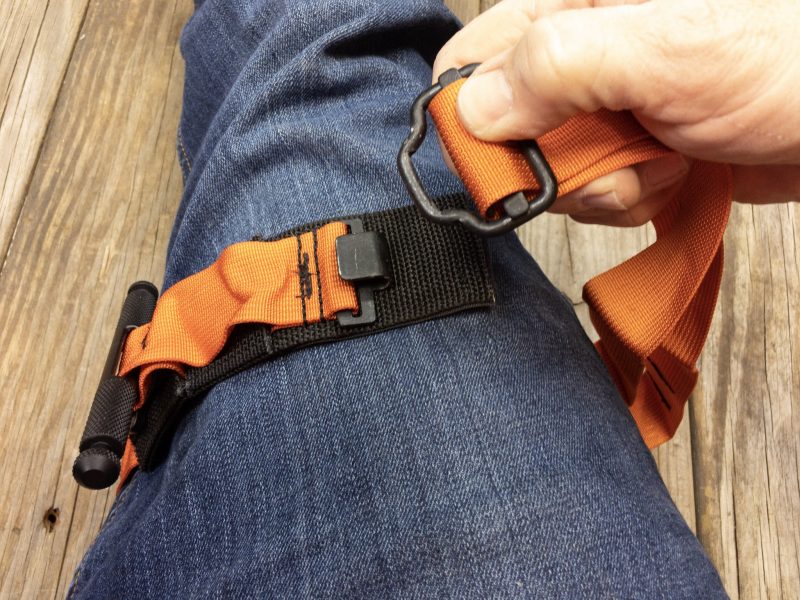
Tightening the tourniquet
If you’re using a proper tourniquet, you’ll be able to hand-tighten the strap as a starting point using buckles or Velcro depending on the model. At this point, you’ll start to turn the windlass which tightens the loop far more than can be done by hand.
It will hurt your “patient” so warn them. You’ll need to tighten the tourniquet until the bleeding stops or slows to a manageable level. It takes a lot. Since this is an aggressive and painful process, it’s important to be sure that your placement and identification of the bleed location is correct the first time around.
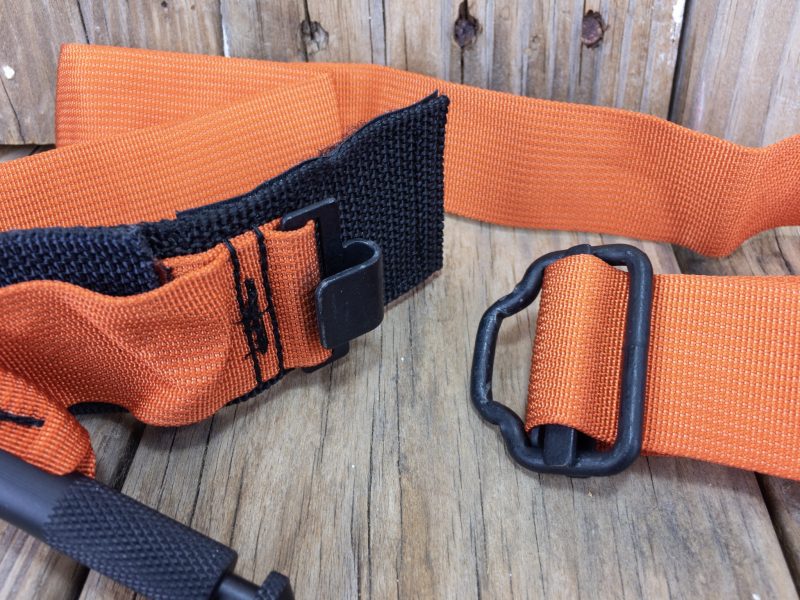
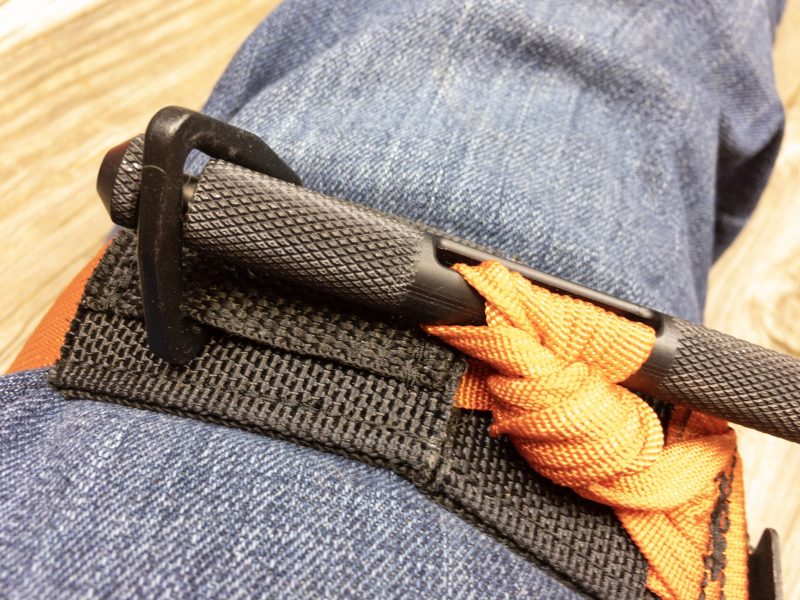
Lock the windlass
One big advantage of a tourniquet over direct pressure is that you can “lock” it in place once it’s applied. Commercial tourniquets will have a plastic loop or catch designed to lock one end of the windlass in place so you can focus on other things rather than holding the tourniquet. This feature is also invaluable should you ever have to apply a tourniquet on yourself. There have been more than a few cases where an individual was able to apply and lock a tourniquet before losing consciousness, thereby saving their own life.
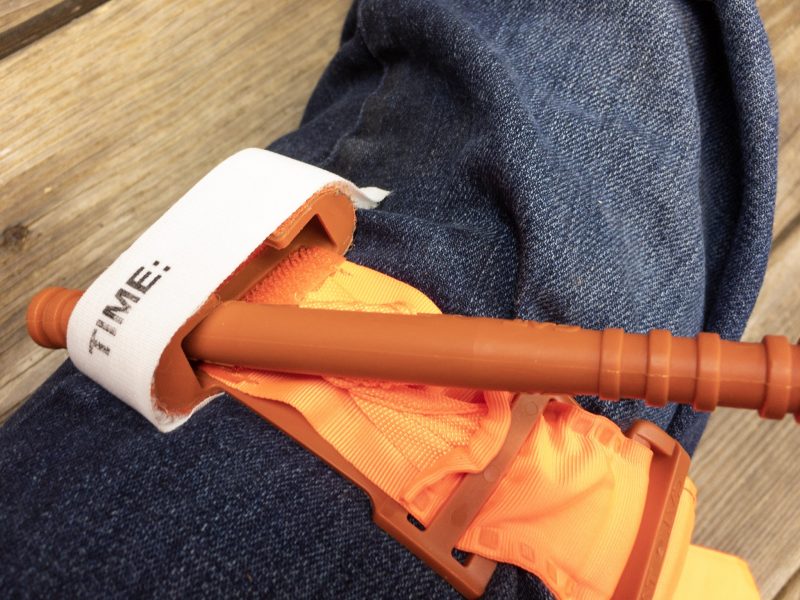
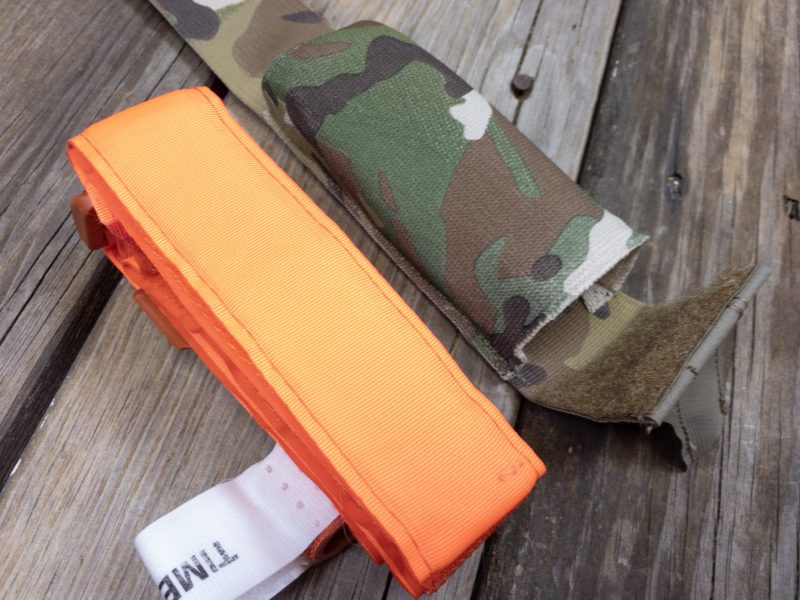
Note the time
Most commercial tourniquets have a tab where you can write the time of application. If that’s not an option, use anything, like a pen, lipstick, or even blood to note the time on the victim’s forehead. If you can do this that will help doctors know what they’re dealing with when the victim arrives for professional care. If you can’t, and you can get your patient to professional care within an hour, focus on transportation first rather than worrying about logging the exact time.
Get the victim professional care
Once you slow the bleeding, you might have bought time to get the victim professional medical care. If someone already called 911, then great, help is on the way. If you need to transport the victim yourself, get going, taking care not to jar the tourniquet loose while moving the victim. Anyone who requires a tourniquet application also requires immediate trauma care.
What to Buy?
I have two different tourniquets in my car and shooting bag and they’re both solid pieces of gear but they have different pros and cons so each is better suited to specific scenarios.
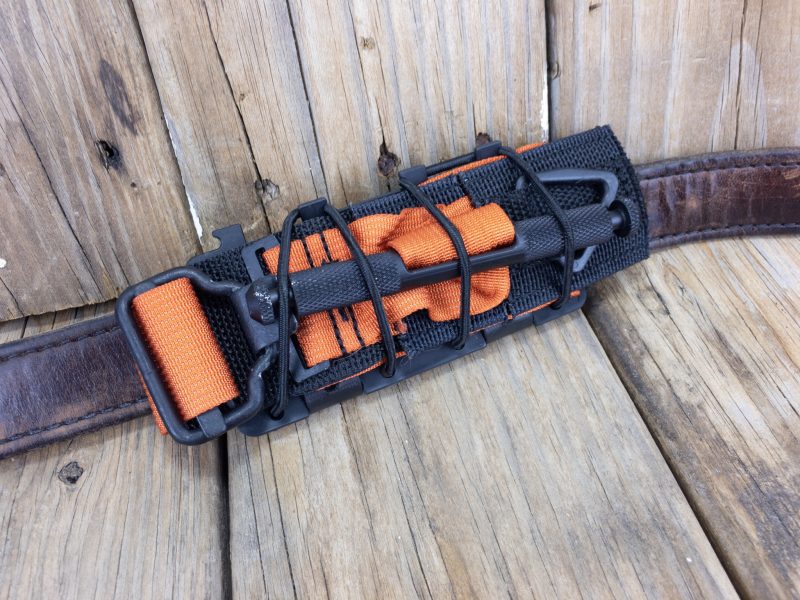
Combat Application Tourniquet (CAT)
The U.S. Army introduced the Combat Application Tourniquet to soldiers back in 2005. It’s made by routing a compression strap through an outer sleeve. This “strap inside a sleeve” design is one feature that makes this a true one-handed application tourniquet. You use Velcro on the outer sleeve to position the tourniquet and hold it in place. Then you can use the same hand to tighten and lock the windlass in the built-in windlass locking hooks. While you can certainly use this tourniquet on another person, it’s very easy, with some practice, to put one on your own arm or leg. In fact, if you choose this model, I recommend practice using it one-handed on each arm and leg so you learn how to do it with confidence.
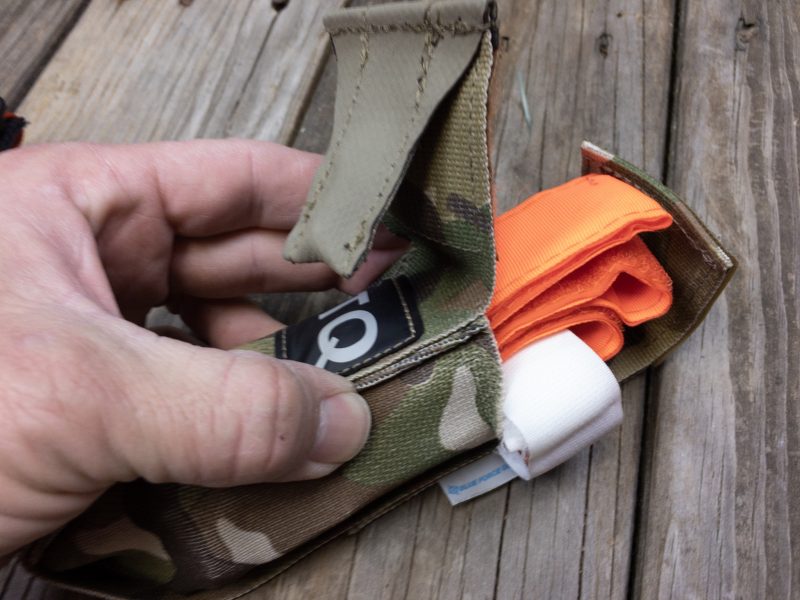
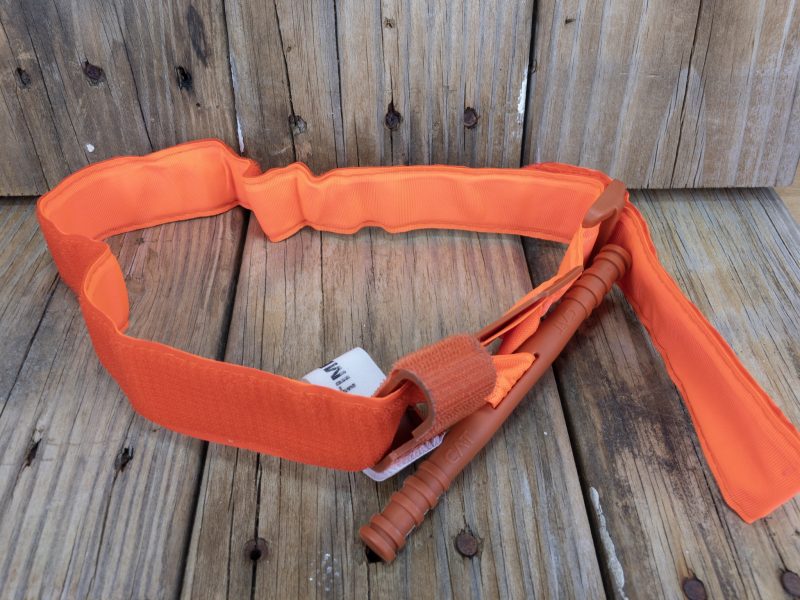
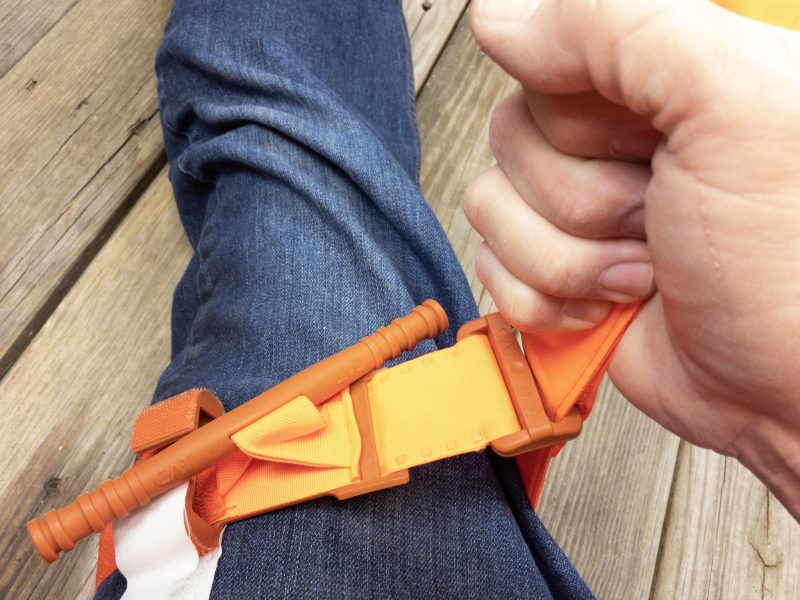
Tactical Medical Solutions SOF Tourniquet
The SOF Tourniquet offers different benefits. While doable, its primary design consideration isn’t one-handed operation. This one uses canvas straps and a metal hook, so you don’t have to work a loop over the entire limb to get it into place. You can reach around the arm or leg and clip the tourniquet together in the right location. Once clipped, pull the strap hand tight through the buckle and commence tightening with the windlass. There is a triangular loop to secure the windlass, so if applied properly, it should stay secure while the victim is transported.
Improvisation
If you need to apply a tourniquet but don’t have one readily available, there are a myriad of everyday items that can be used to improvise. For the strap, a flexible material like a torn t-shirt, necktie, or similar material can do the job. Using a leather belt isn’t recommended as the material is not flexible enough to adequately tighten with a windlass to provide sufficient compression. It looks great in the movies, but isn’t nearly as effective in real life.
For the windlass, be creative. Pens, flashlights, rulers, sticks, a gun magazine, or any other solid object of similar size can do the job. In one case, a man working near a computer saved his own life by using computer cords (not recommended but he had no choice!) and a computer keyboard for the windlass. When the alternative is death, you have nothing to lose by trying to get by using whatever is at hand. Remember, you’ll need to fasten the windlass somehow. Usually you can insert it into the material you used for the strap and tie a knot or two over it.
No, you’re probably not going to need to use a tourniquet to treat a gunshot wound victim. But if that need ever arises, you’ll be glad to have the knowledge. However, more mundane accidents and injuries occur every day all around us, so you might just find yourself as a first responder, at which point you’ll also be glad to have this type of training.
Make it a late New Year’s resolution to go take a class. An hour or so of education might make the difference between life and death for you or someone else.

