Excavate Rocks Like the Ancients – With Fire
Jordan J. 11.24.21
With all the modern technology, gear, and equipment around us, we sometimes forget how powerfully effective simple forces are, and how — if the need arises — we can utilize those forces to get the job done.
Before the invention of gunpowder and industrial blasting techniques, there was one primitive method for removing large boulders from construction sites — Fire-Setting. Apparently, “Fire-Setting” is the name for an ancient mining technique used pre-gunpowder, and this method is still a viable option nowadays.
I think the term “fire-setting” is somewhat cumbersome, because any fire has to be “set.” It’s also apparently the clinical psychological diagnosis for early adolescent interest and commission of pyromania. So, for the purpose of this article, I’m going to use the less ambiguous term “fire mining,” since that’s essentially what it is — using fire to mine, or excavate rock.
I discovered fire mining this spring when I purchased a 6 X 8 greenhouse kit from Harbor Freight and decided to set it up on a sunny hill behind our house. I selected the perfect spot, marked out the area, and began tilling and leveling the ground. A few minutes in, I hit a rock, about six inches below the surface. But that’s okay (I thought)! This is the northeastern US, and our top soil resembles industrial backfill. I’ve been digging out rocks my whole life. I began shoveling around the rock, trying to find the edge so I could lever it out with a six foot pry bar.
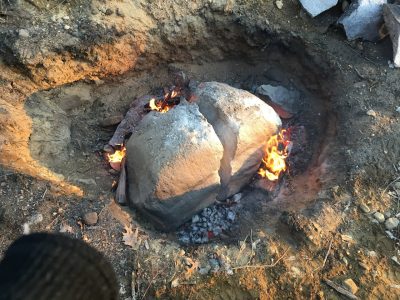
Pretty soon, I discovered that my rock was actually a boulder:
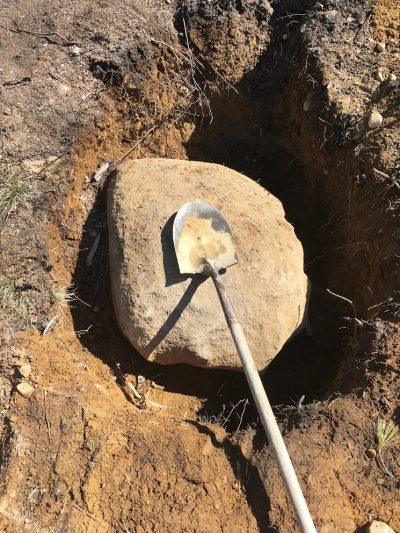
It was a solid piece of New England granite, about 3 feet long by 2 feet wide by 3 feet tall. According to science, a cubic foot of granite weighs roughly 168 pounds, and I was looking at approximately 18 cubic feet. Doing the math, that’s over 3,000 pounds.
At this point, I tried a bunch of things.
I tried thinking of a new place to put my greenhouse. However, there were rocks and stumps everywhere, so I had no guarantee I wouldn’t find a similar problem somewhere else. Besides, I had picked the sunniest spot on the hill, and I didn’t want to lose that advantage.
I tried getting a 2-ton floor jack braced on wood underneath the boulder to try and lift it. It’s not worth mentioning anything else about this failed idea.
I tried hitting the rock with a sledge hammer to see if it would obligingly break. Nope.
Blasting was out of the question — not only would hiring a professional exceed my project budget, this was in a residential area where a blast would damage the foundations of multiple neighboring houses. Due to the topography, getting an excavator in would also be a pricey proposition, and probably damage my leach field. A jackhammer might have worked, but again, it would cost money to rent one, and I wasn’t convinced I’d be able to find a strong enough jackhammer that wouldn’t require hours of bone-rattling exertion.
I’m not sure when or how the idea of using fire entered my mind — maybe I’d heard of it, or read about it in some old book? Anyway, I did some research on the internet, came across this wikipedia page, and decided to give it a try.
Naturally, when I told my friends and neighbors what I was going to do, they all laughed at me; and you might laugh too, if this wasn’t a blog post in a reputable outdoor online publication.
I’ll go ahead and spoil the ending for you — the fire method worked spectacularly. I got the whole boulder out in chunks, used it to make a beautiful retaining wall for my greenhouse, and had a great growing and harvest season in that greenhouse with the excellent soil I was able to backfill into the massive crater:


How it worked
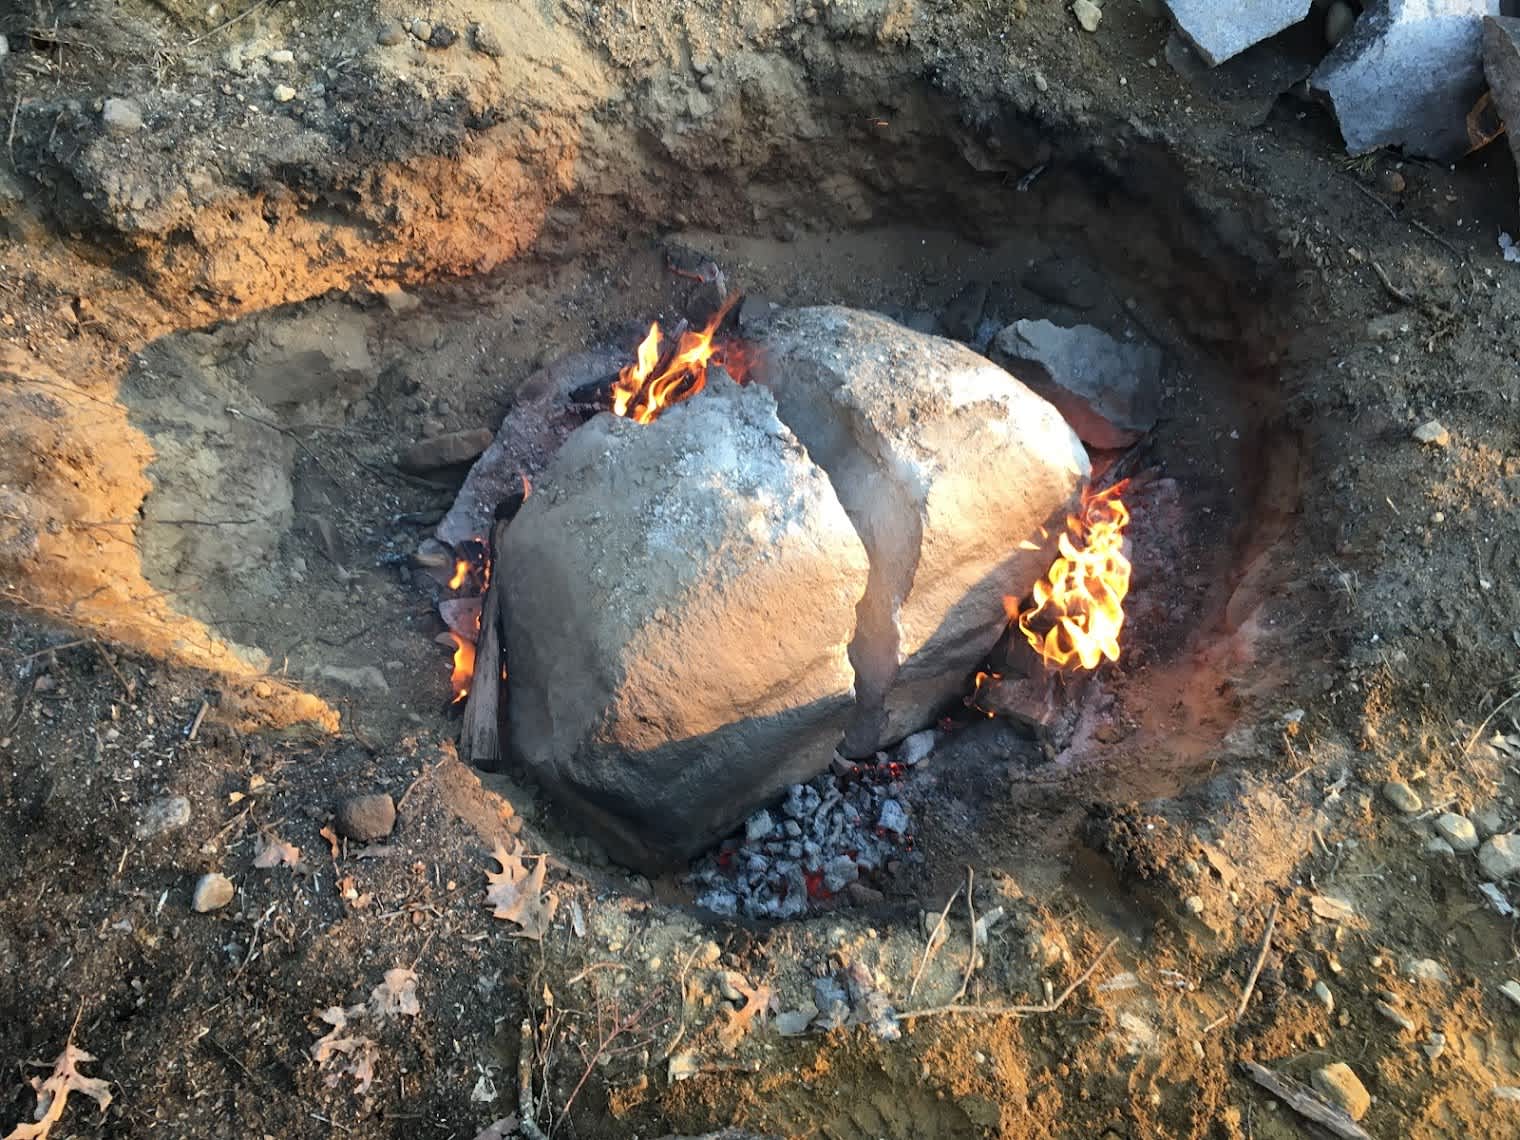
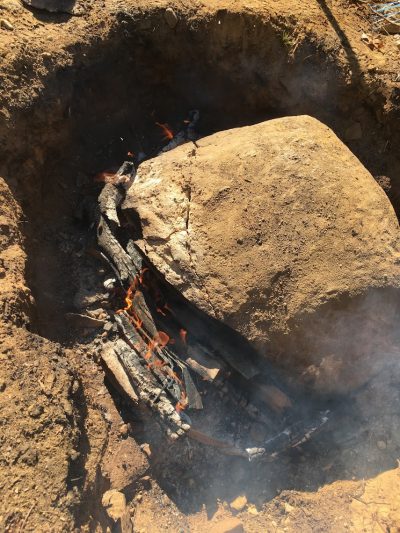
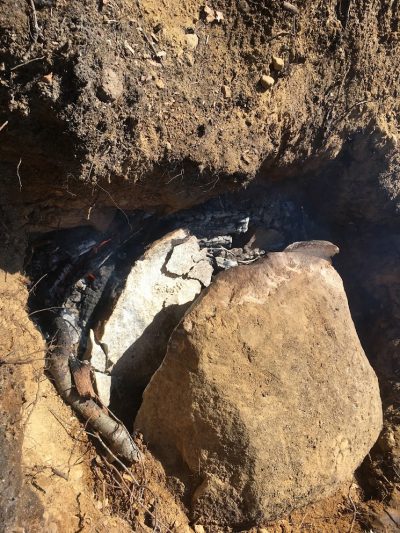
The basic idea behind fire mining is that if you get a rock hot enough, it’ll break into smaller, more manageable pieces. To accomplish this, I got a good wood fire going at the base of my rock and waited to see what would happen.
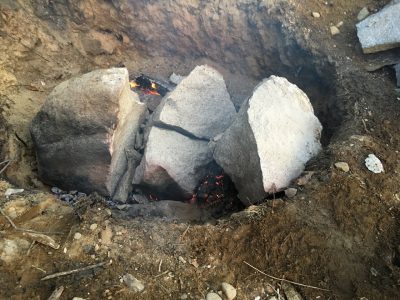
Several hours into sitting around my big rock bonfire, my granite boulder began to visibly crack and spall (the process where a rock sheds pieces under stress):
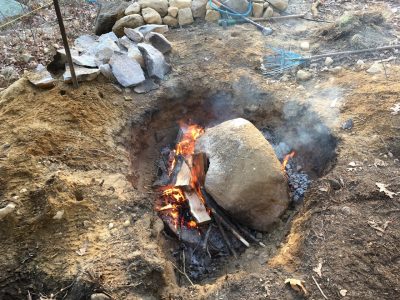
Working at the cracks with an iron digging bar and sledgehammer, I was able to accelerate the process and break off even more slivers. Little by little, the boulder shed chunks of granite until it finally split in half hours later:
I kept removing pieces using heavy thermal gloves (the pieces are HOT!) until, by nightfall, all that remained were a few big chunks that I could roll out the next day when they cooled:

The process worked! If you ever encounter an immovable rock and need an unstoppable force to dislodge it, here are four tips on how to leverage this ancient technique and move gigantic rocks using only fire and basic digging tools:
1. Safety First
Always burn responsibly — check your local forest fire threat level, check your local burn ordinances, and make sure you have adequate fire prevention equipment on hand in case the fire gets out of control. For my burn, I had both a garden hose and several fire extinguishers. I regularly wet down the area surrounding my pit to make sure there was nothing flammable anywhere near my burn site.
Second, be mindful to avoid smoke inhalation. In the ancient days of fire mining, historic miners got in trouble because they tried to use fire to dislodge boulders while underground. As you can expect, these peoples’ genes are not still in circulation. Hopefully you aren’t thinking of trying this underground, but since you’ll be working over top of the fire, be careful about getting smoke in your lungs. In my case, I was so curious to see what happened that I got a little too close and ended up breathing some smoke; so, don’t be like me.
Lastly, (and this is very important), make sure your particular rock won’t explode when heated. Porous rocks that trap air and moisture inside will detonate violently when these pockets heat and expand, and you do not want to fire mine those types of rocks.
Here’s a good analysis on rocks that are safe to burn. You’ll note that granite is mentioned as one of the safest rocks, least likely to explode, and I had no issues with my granite boulder.
2. Clear enough space
You want your boulder to be surrounded by firewood to get it nice and hot, so the more dirt you remove the better. Also, if you can clear out a little dirt underneath the boulder, it’s great if you can have the fire underneath so heat can travel upwards into the stone.
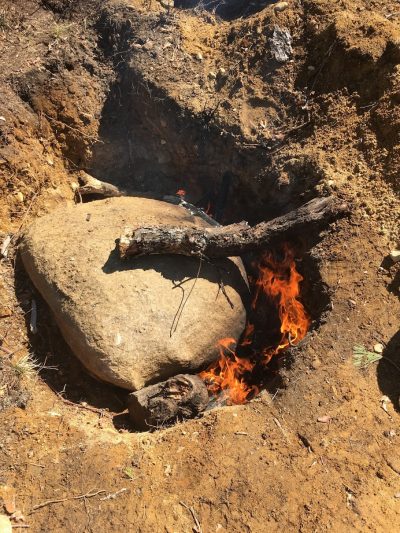
As you see in this picture, I mainly burned on one side of the boulder where I had tried to place the floor jack, and where there was a nice cavity under the rock. Things might have gone faster if I’d burned around the entire perimeter of the rock the whole time.
3. Bring enough wood
I started off with a nice bonfire-sized pile of firewood and brush, but it wasn’t enough. By the end, I’d burned about a week’s worth of stacked cordwood, and all the brush within a thirty foot radius. My fire waned and cooled while I hurried to bring more wood after I’d exhausted my initial stockpile, and this decreased the efficiency of the process.
Have a good supply of seasoned wood stacked and ready to go near your excavation site so you can keep a hot fire going until the rock breaks.
4. Schedule enough time
I lit my fire around noon on a Sunday, and I burned steadily for about six hours, finally finishing up around 6:30-7. Because you want the heat to build and build in the rock, this process MUST be completed in one sitting, or you’ll waste a lot of time and firewood. Plan to fire mine when you have a full day ahead of you with no interruptions.
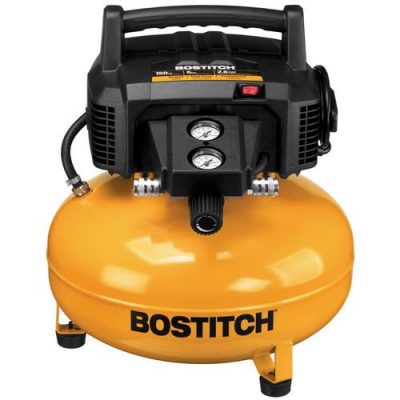
One time saving trick I employed was to use an air compressor to stoke the fire. Yes, I know this is cheating. The ancients didn’t have a 6 gallon pancake compressor, so if you’re into historical re-enactment, use a bellows. Whatever your method, the hotter your fire, the faster the process will go — but even with a superheated fire, prepare to spend at least a half a day at it.
5. Eat enough for breakfast
The nice thing about fire mining is that the fire does most of the work for you. A lot of the time, you get to just sit outside, tending a nice bonfire and relaxing. You could even roast some marshmallows. I certainly ate a lot of ice cream.
However, as soon as a faint hairline crack forms, you’re going to want to work those faults aggressively with a sledgehammer, pick, and iron digging bar. It will be tough work, but it’s worth it. The more you work those cracks with hand tools, the faster you’ll peel away chunks of rock:
A jackhammer or impact tool could also be employed at this point if you have access to one and want to speed up the process. Just make sure that if it’s electric or pneumatic the cord or hose doesn’t touch the boiling hot rock!
Conclusion
I was very happy with how the process went, and my doubting neighbors even stopped by later on to be impressed. I’ll definitely consider this technique again in the future as an alternative to blasting or excavating. If you’re patient, safety conscious, and willing to sweat for a few hours, this can be a great way to avoid the cost of renting equipment or hiring professionals to move rocks for you.