How To: Rattle-Can your Rifle
Taylor Hutchinson 05.12.23

The art of concealment and camouflage is nothing new to our modern world. History is flooded with hunter-gatherer societies and military conflicts that utilized different methods to blend in with their environment, avoid detection, and gain an advantage over their game or opponent. From the ancient Greeks and Romans to the modern-day militaries of the world, the use of camouflage to disguise soldiers and equipment, create decoys, and manipulate terrain. Nature influences our developments in camouflage through disruptive coloration, mimicry, counter-shading, and texture matching. The use of colors, advantageous lighting conditions, and textures allow us to manipulate and break up visual signatures that draw eyes away from what is being sought. Camouflage and firearms go together like a moth to a flame. Mainly because every time someone brings up applying camouflage to a firearm, especially with the good ole rattle-can spray paint, a flame war ensues. Arguments are persistent over whether to apply hydro dipping, various ceramic coatings, or spray paint. Spray paint isn’t the end all be all when it comes to gun coatings. When it comes down to it, spray paint flakes, rubs off, and isn’t super precise. However, it’s the one camouflage method that is the best vibe. It allows one to personalize a gun like no other. It tells a story of where it’s been and how it’s been used. A patina develops over time and some gun owners pay a lot of money to get a “battle-worn” look. This is a sign and permission slip to rattle-can that rifle.
The “how” around spray-painting a firearm varies, but there are some basic rules to follow. The allure is that it is more art and less of a science. Ultimately, have fun with the process, don’t stress that it feels wrong the first time, and let loose on the first coat. That said, before one gets started, some basic prep work needs to be done. In some cases, I would recommend disassembling the firearm as the first step. In this case, the AR-15s and Ruger American being worked on have internals fairly sealed up. If one does break down their gun, the masking stage may take longer. Masking is probably the most important piece to the process, so take some time here. Acquire some basic painter’s tape, wide blue painter’s tape was a good choice for this project and a box cutter. Give the surfaces a decent dry cloth wipe down. Use some rubbing alcohol or degreaser if the surfaces are especially oily. Be sure the degreaser is safe for the surface being degreased. Wood and some plastics are prone to damage with some degreasers out there.
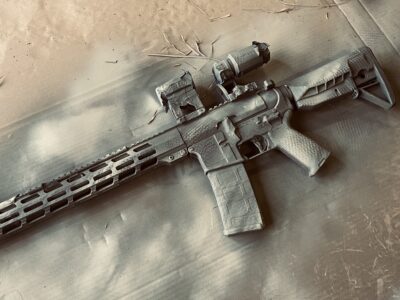
Now apply the masking tape to areas where the paint would be a hindrance to using the gun. Focus on optics glass, exposed turrets with tick marks, iron sights posts or apertures, and other egress points. Muzzle devices that host a suppressor are something to watch for as well. Adding material to threads or locking lugs would create some frustrating problems down the road. Masking the trigger is also a good idea as it acts as our interface to the internal parts of the receiver. Not all triggers are the same, and some have more egress areas than others. I have a rifle that has a piston gas system and utilizes vents to bleed gas during the firing process. These were masked to prevent issues with cycling the gun. The paint probably would have cooked off after a magazine or two, but didn’t want to chance that happening. Speaking of cooking the paint off, it’s advised not to spray-paint a suppressor as it will not last long and does not provide any real benefits. Now that the rifle is prepped and masked, let’s look at our base coat.
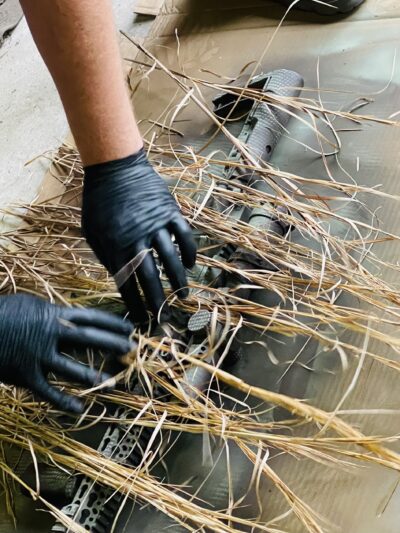
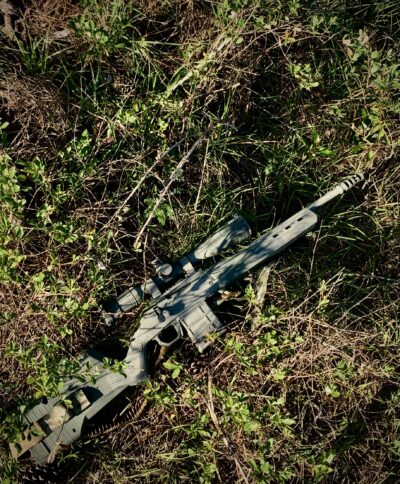
The color palette chosen is generally up to personal preference and the environment one is trying to blend into. Living in the Southeastern United States, darker browns, two shades of green, and a tan color palette appear to be the right decision. Lay down some old cardboard outside, preferably on a less humid day, and get to work. For a base coat, the best practice is sticking to a color that will be the least prevalent on the gun. Adding various colors in layers will start to contrast and pattern this base color. Then the finished product will start to blend and fade into the backdrop. If wanting the finished product to be a shade lighter, start with a darker base, as that contrast will provide a better pattern that pops and breaks up the outline of the rifle. An important thing to note here is patterning. Vegetation, sticks, and even a laundry bag make great stencils for breaking up the shape of the rifle. The ticket is to go big, broad, and deep with contrasting colors. This is something that I would go back to redo if I could. It’s easy to underestimate the amount of paint the mesh laundry bag would absorb. When applying that first coat, one may get the sense of doing something wrong. That is normal, keep going and enjoy the process. Letting the paint dry between coats helps prevent streaking from adjusting the stencils. Overall, taking one’s time between coats helps the finished products come out looking sharper. Taking breaks, 15-30 minutes between coats, is a good rule of thumb. When finished store the rifle somewhere dry for 24–48 hours to let the paint set. Subsequently, go rub some dirt on it. Take it to the range and shoot it.

After this round of painting develops a nice patina, I plan to go back to broaden the contrasting strokes. The best part of the rattle-can paint job is the small nicks and wear points that develop over time. It gives a unique flavor to the gun that can’t be replicated. Camouflage is an important art form to learn. The utility of applying camouflage to a rifle stems from a protective coating to reduce one’s visual signature in their environment. Rattle-can spray paint offers a unique blend of art and utility that is unmatched when it comes to camouflaging gear. Keeping an open mind unlocks certain nuances to experiences that are reserved for those willing to step out and try something new. When it comes to something as simple as painting a rifle, that nuance is found in a can.

