DIY Camo Painting a Rifle Stock with Sea Sponges
Eugene L. 10.24.23

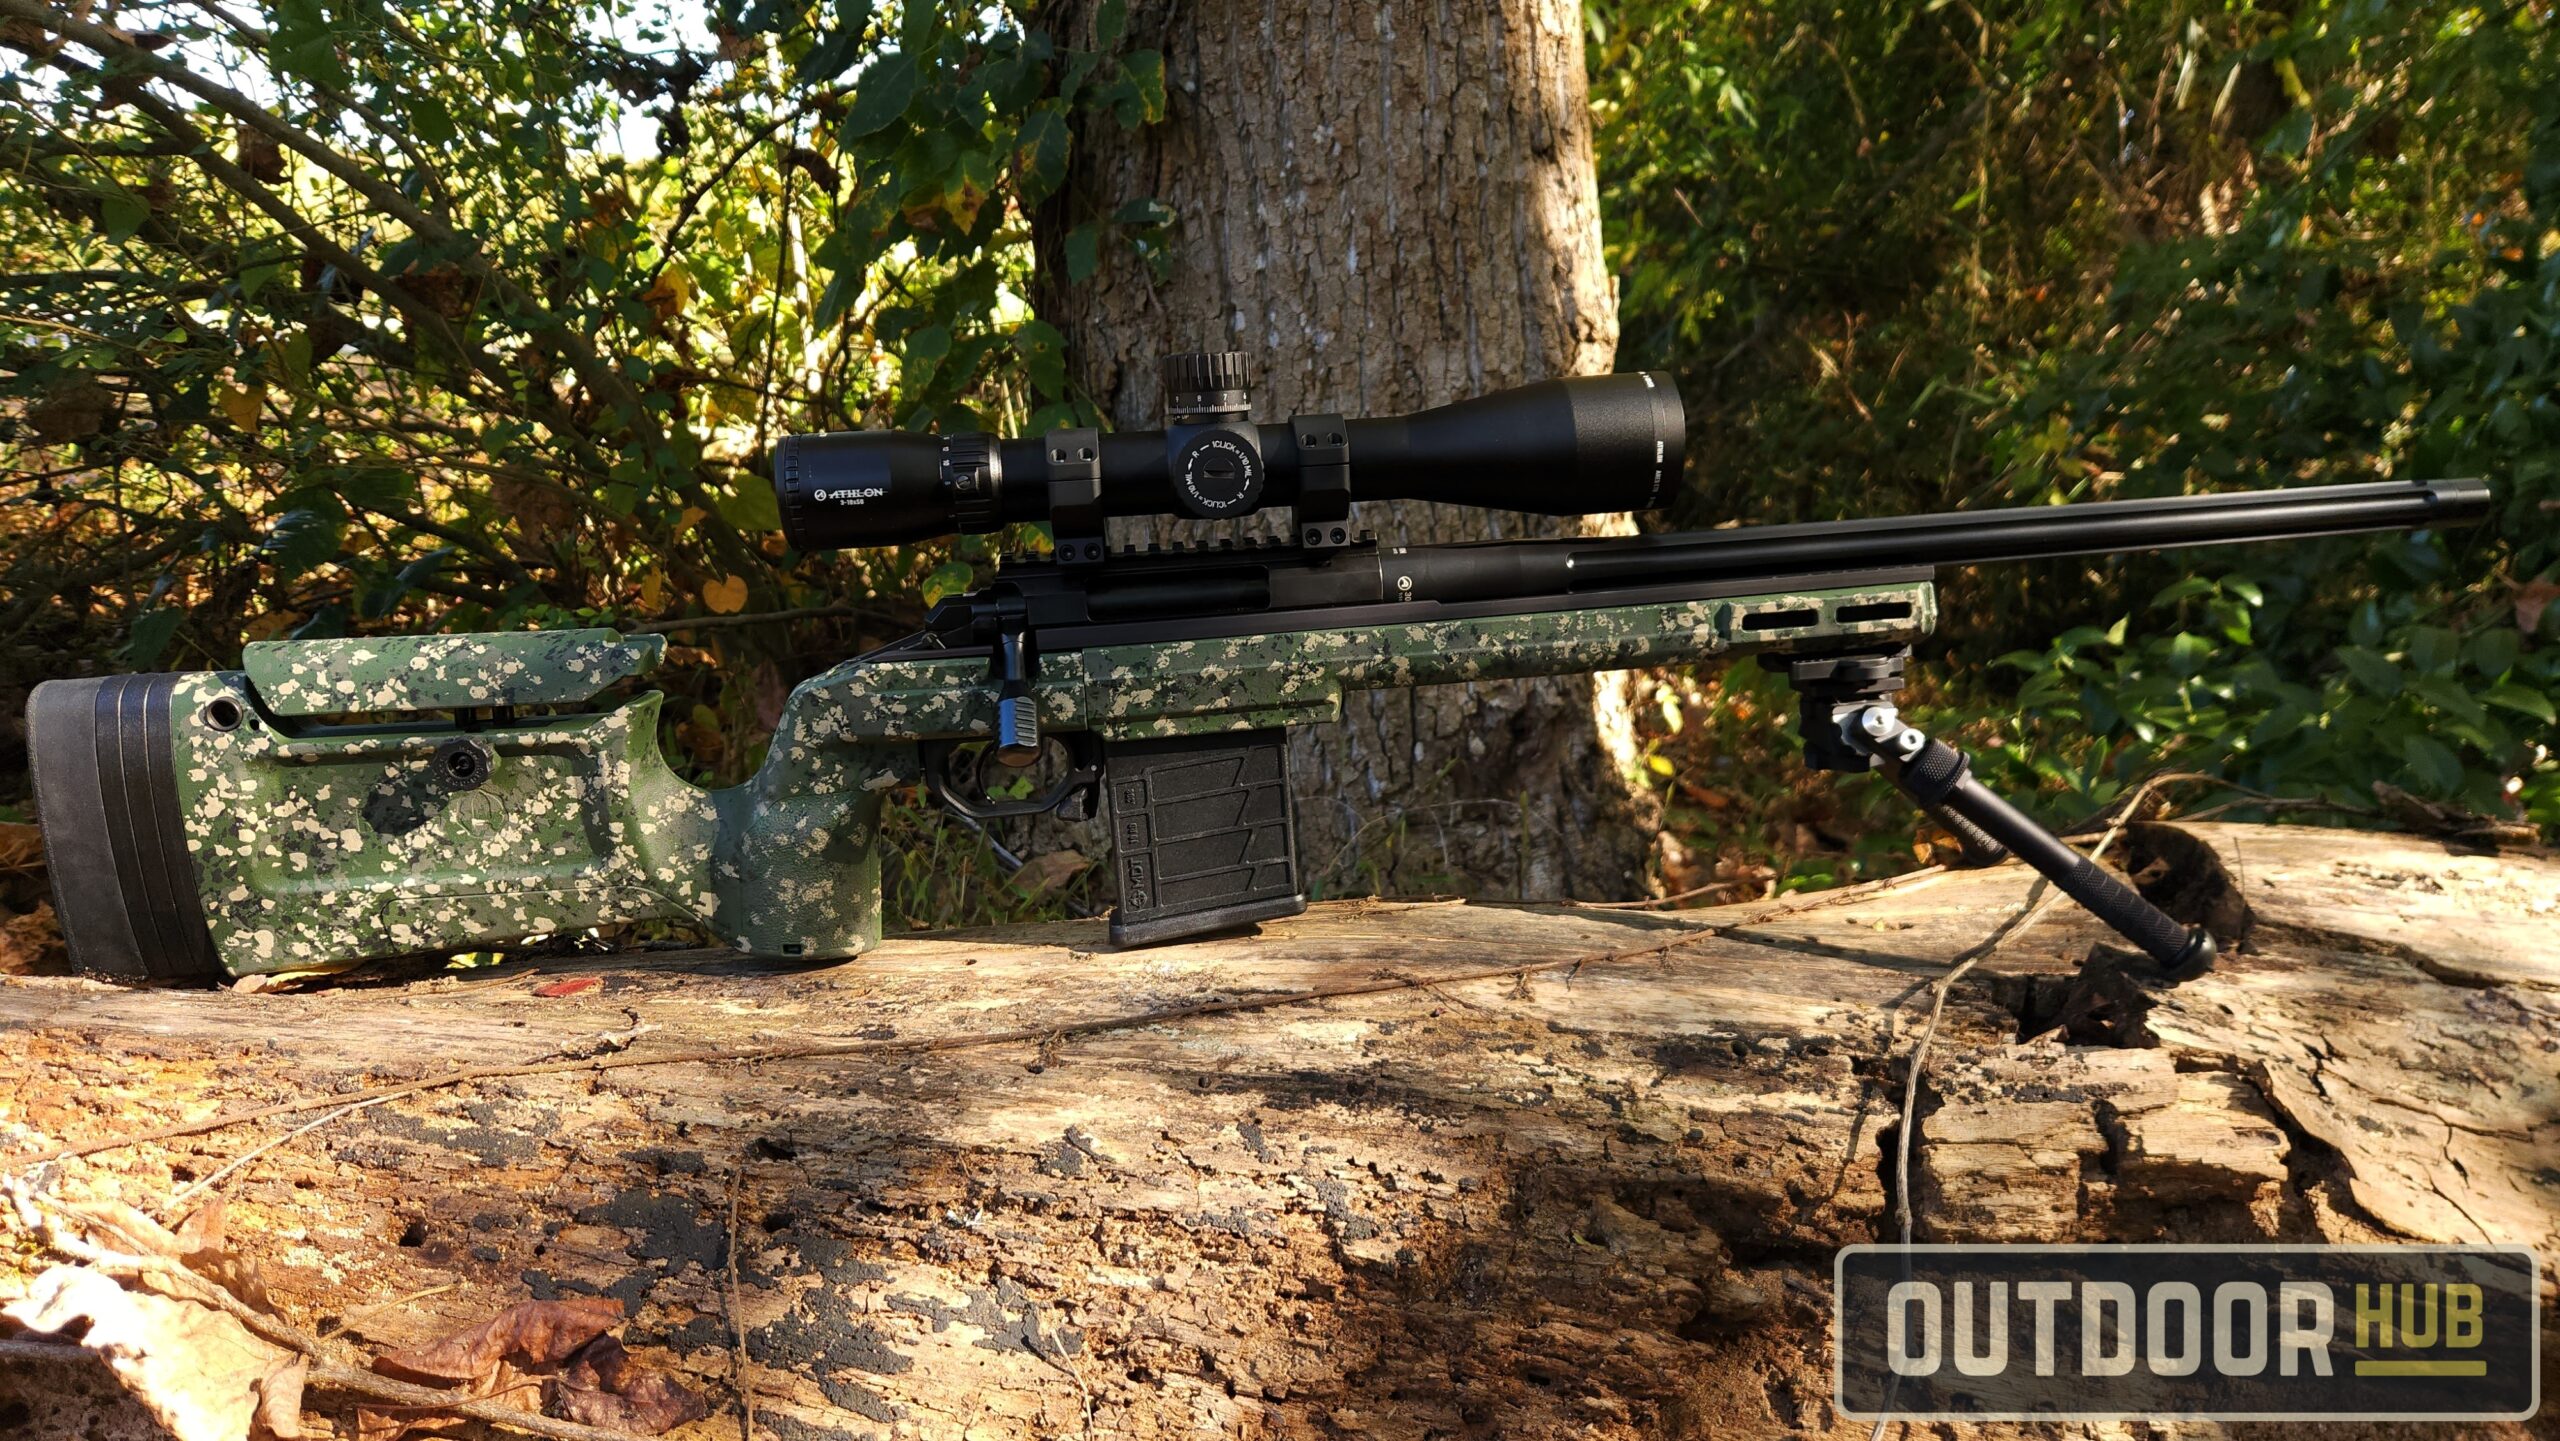
I recently got a new Aero Precision Solus action along with a KRG Bravo Chassis to be my go-to bolt gun for both hunting and longer-range target shooting. While the Sako green of the rifle stock is very nice, my plan wasn’t to keep it that color for long. I wanted to give it a little more character with a touch of camo pattern and knew the green would be a great base color for just that. So I’ll show you how to do just that for pretty cheap. All you will need today is a few different colors of Rustoleum camouflage paints, isopropyl alcohol, painter’s tape, and some natural sea sponge pieces. This is a surprisingly easy project to that that is nearly impossible to mess up.
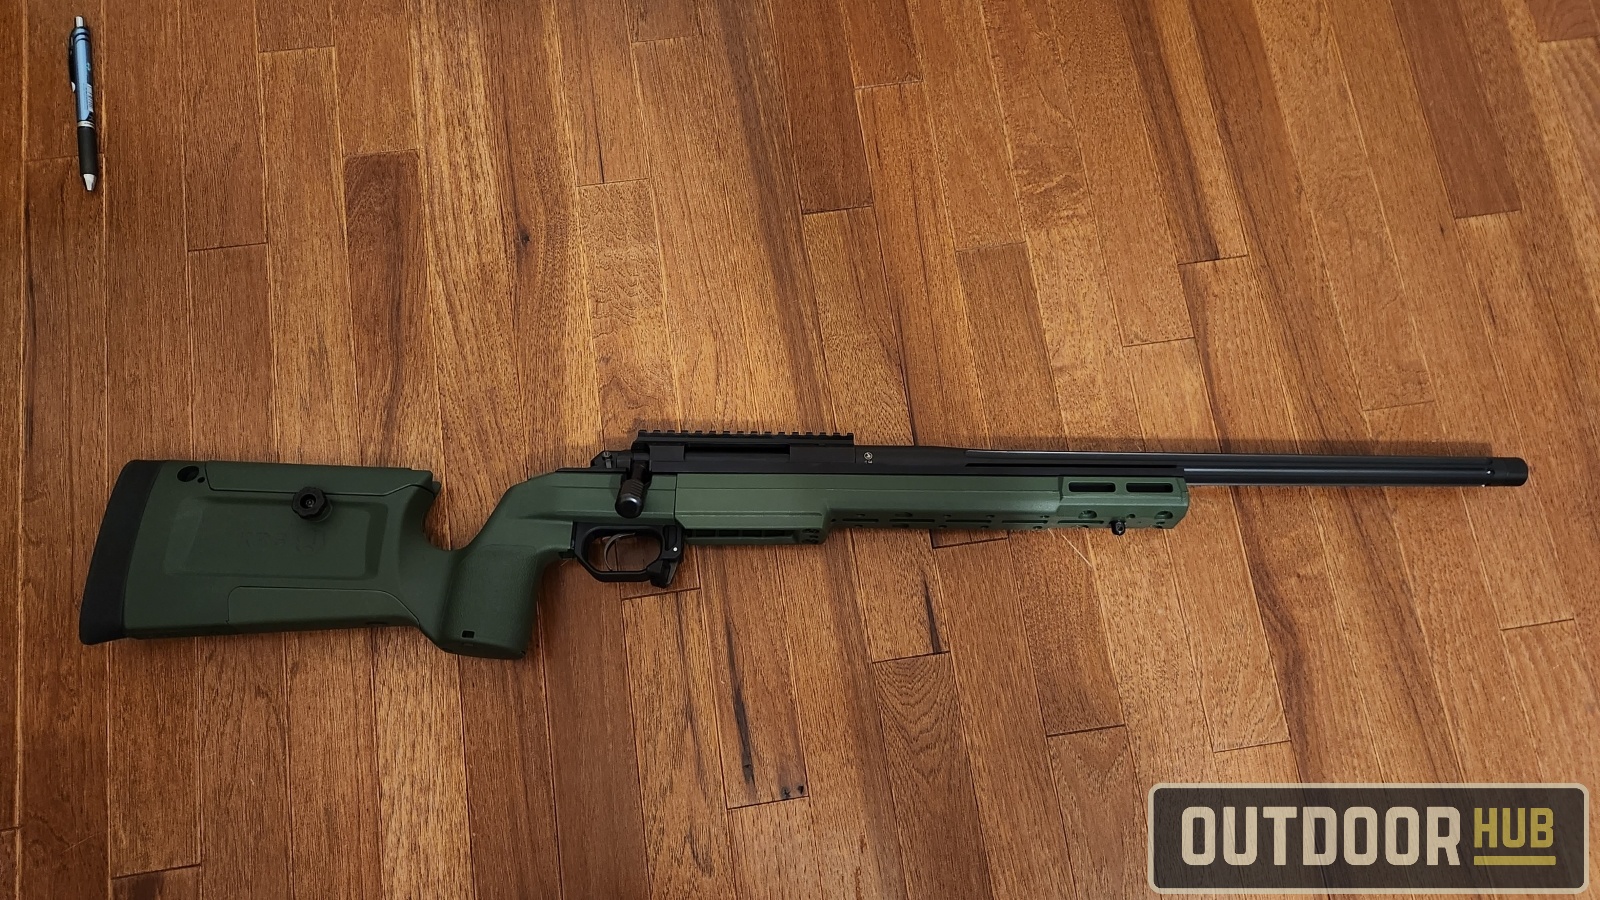
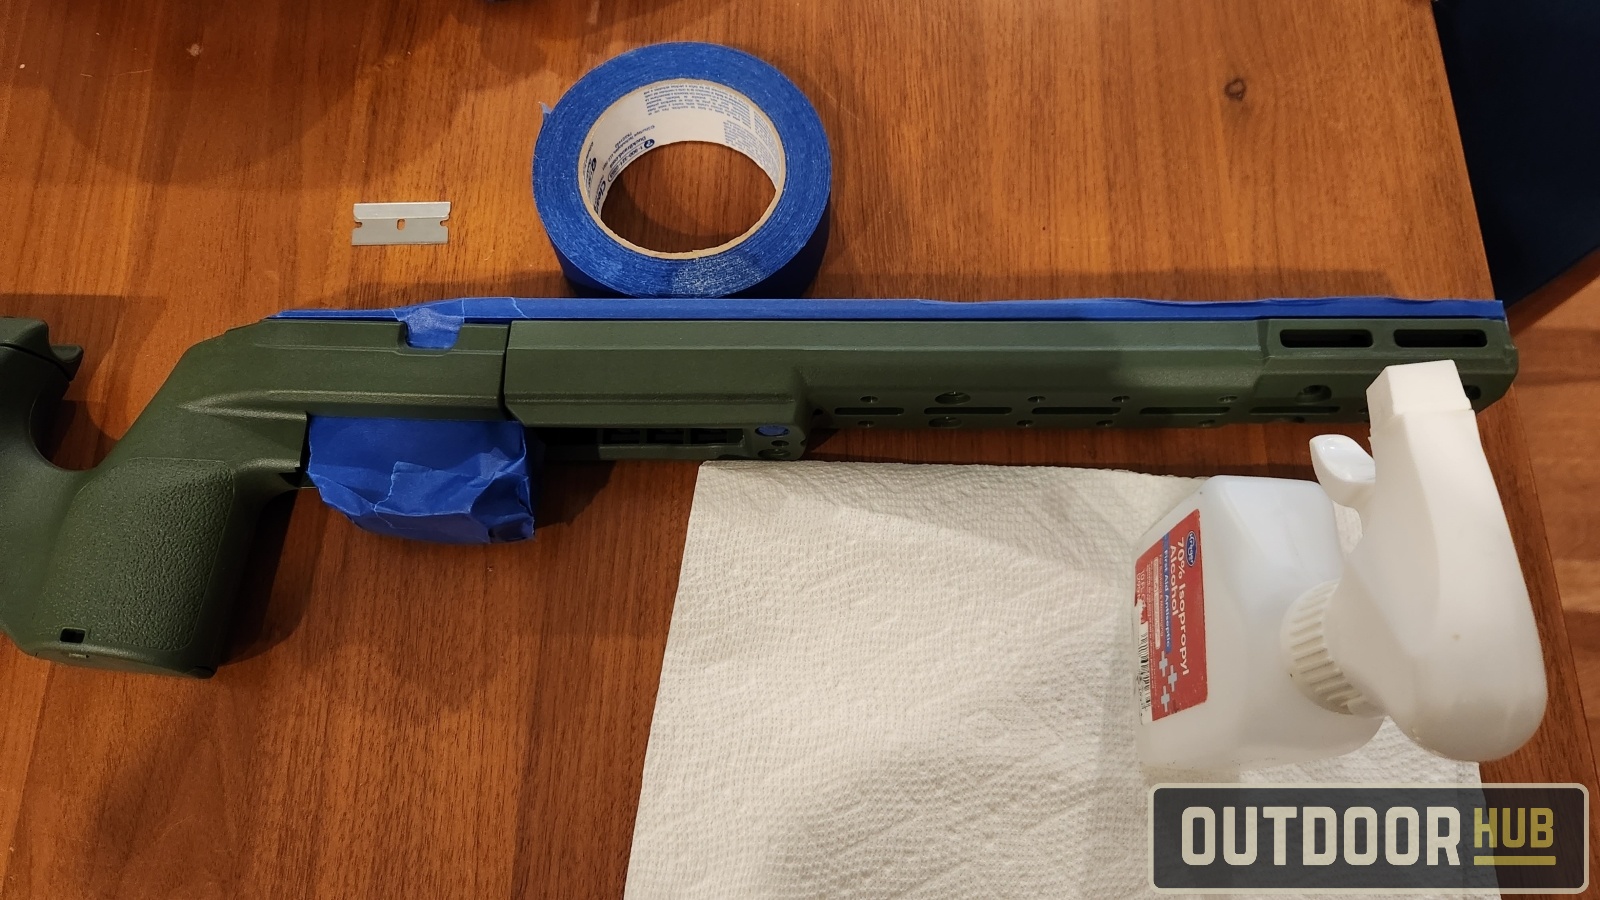
Okay, the first step is to remove the action from the rifle stock. Then start stripping down all the components you don’t want painted off the stock. I chose to only paint the green plastic parts of the KRG Bravo, but you can just paint the whole thing if you’d like. You could even leave the rifle action in place, but I chose not to go that route. I do need to say though don’t paint any rubber parts like the recoil pad. The paint won’t adhere well and will shed when it stretches and compresses with use. Once you have everything you want removed give the rifle stock a good scrub down with some isopropyl alcohol to help degrease the surface for better paint adhesion.

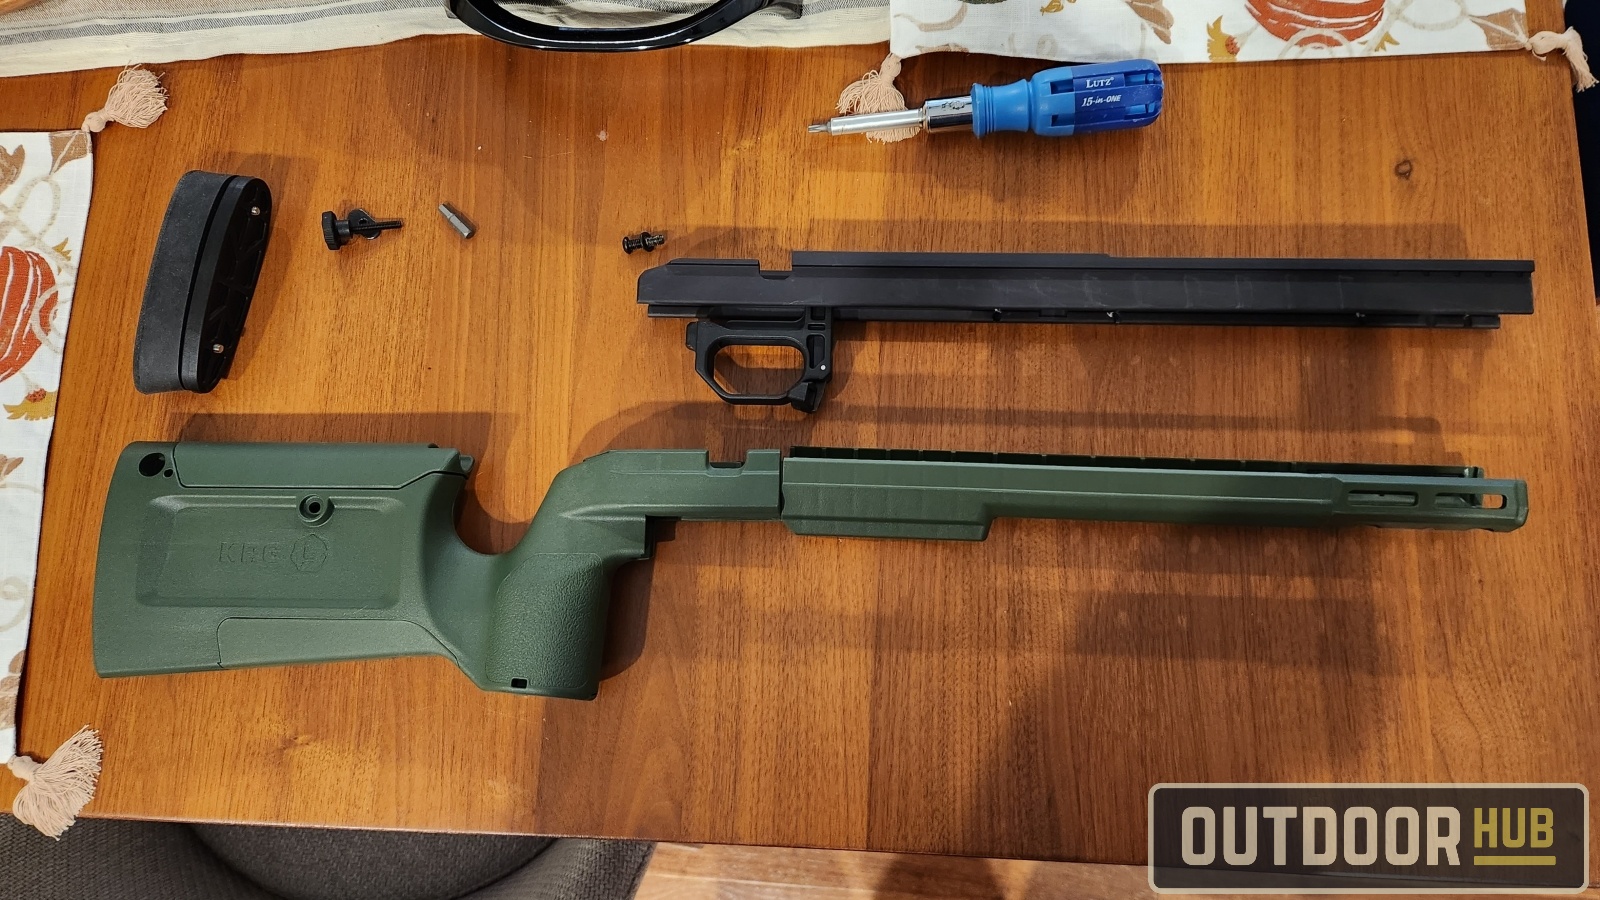
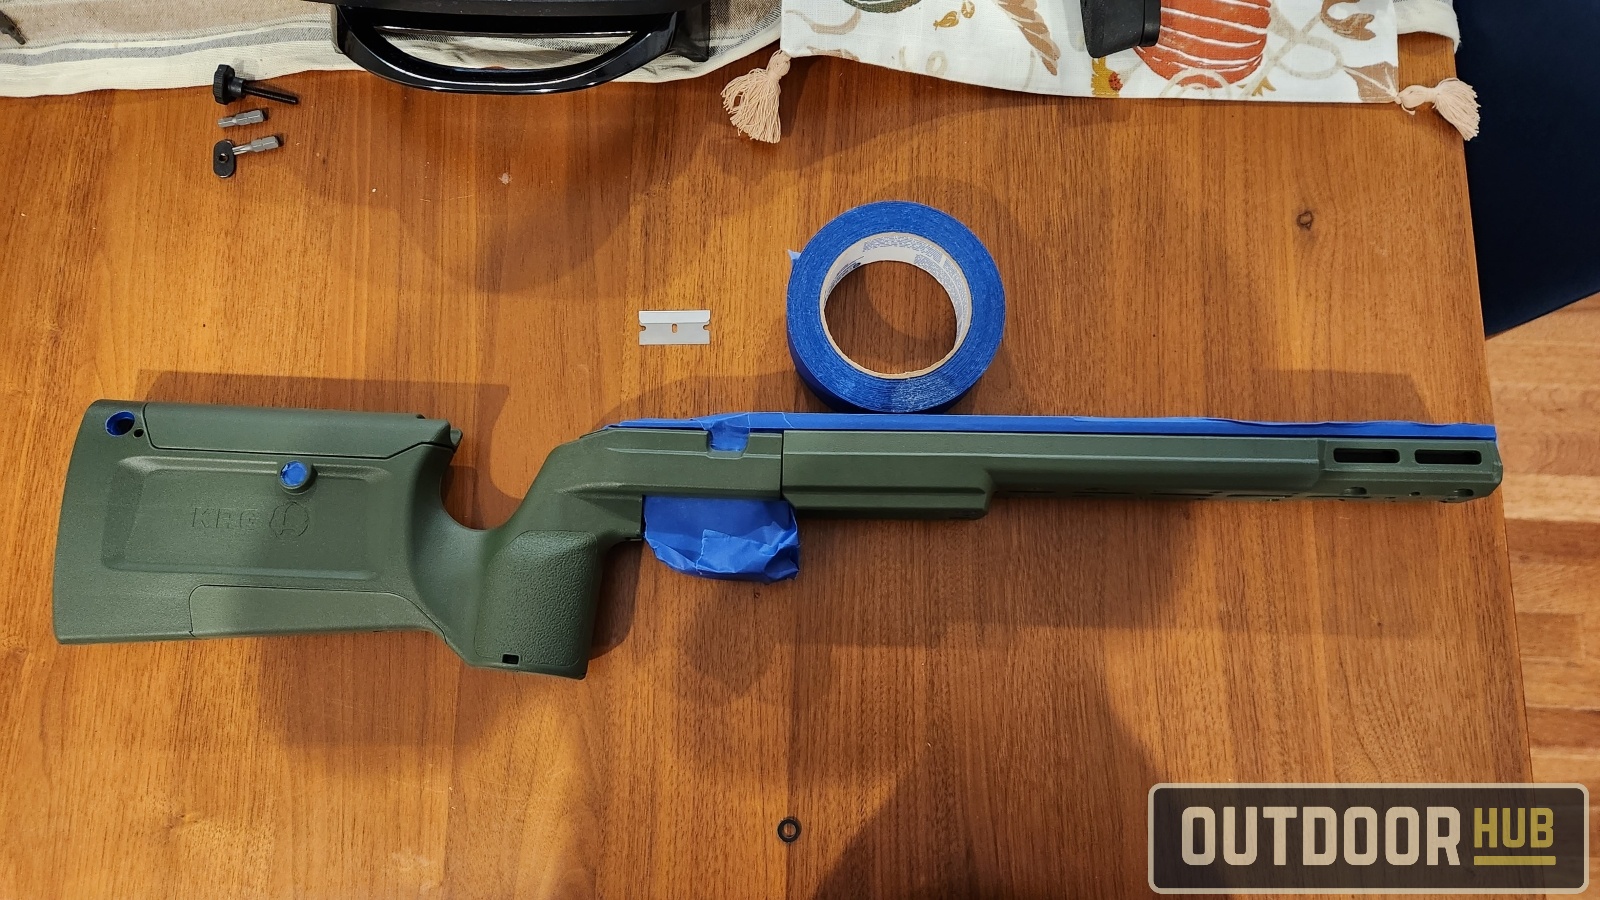
Now you got all that done, it’s time to tape off everything that shouldn’t get paint on it. This is any of the screw holes and QD cup spots on the stock, you don’t want paint to get into these areas. The paint buildup can cause parts to not fit or bind up. Once the taping is done, scrub everything down with some isopropyl alcohol to degrease. I also reattached everything to the aluminum frame at this point so it would be one piece during the painting process. If you want a completely different base layer color for your rifle stock I recommend you buff the stock with an abrasive brillo pad first then wash and degrease it. That way whatever primer or base coat you place down on the rifle stock will have good adhesion to the plastic. After this point try to wear gloves to keep your hand’s oils off the stock.
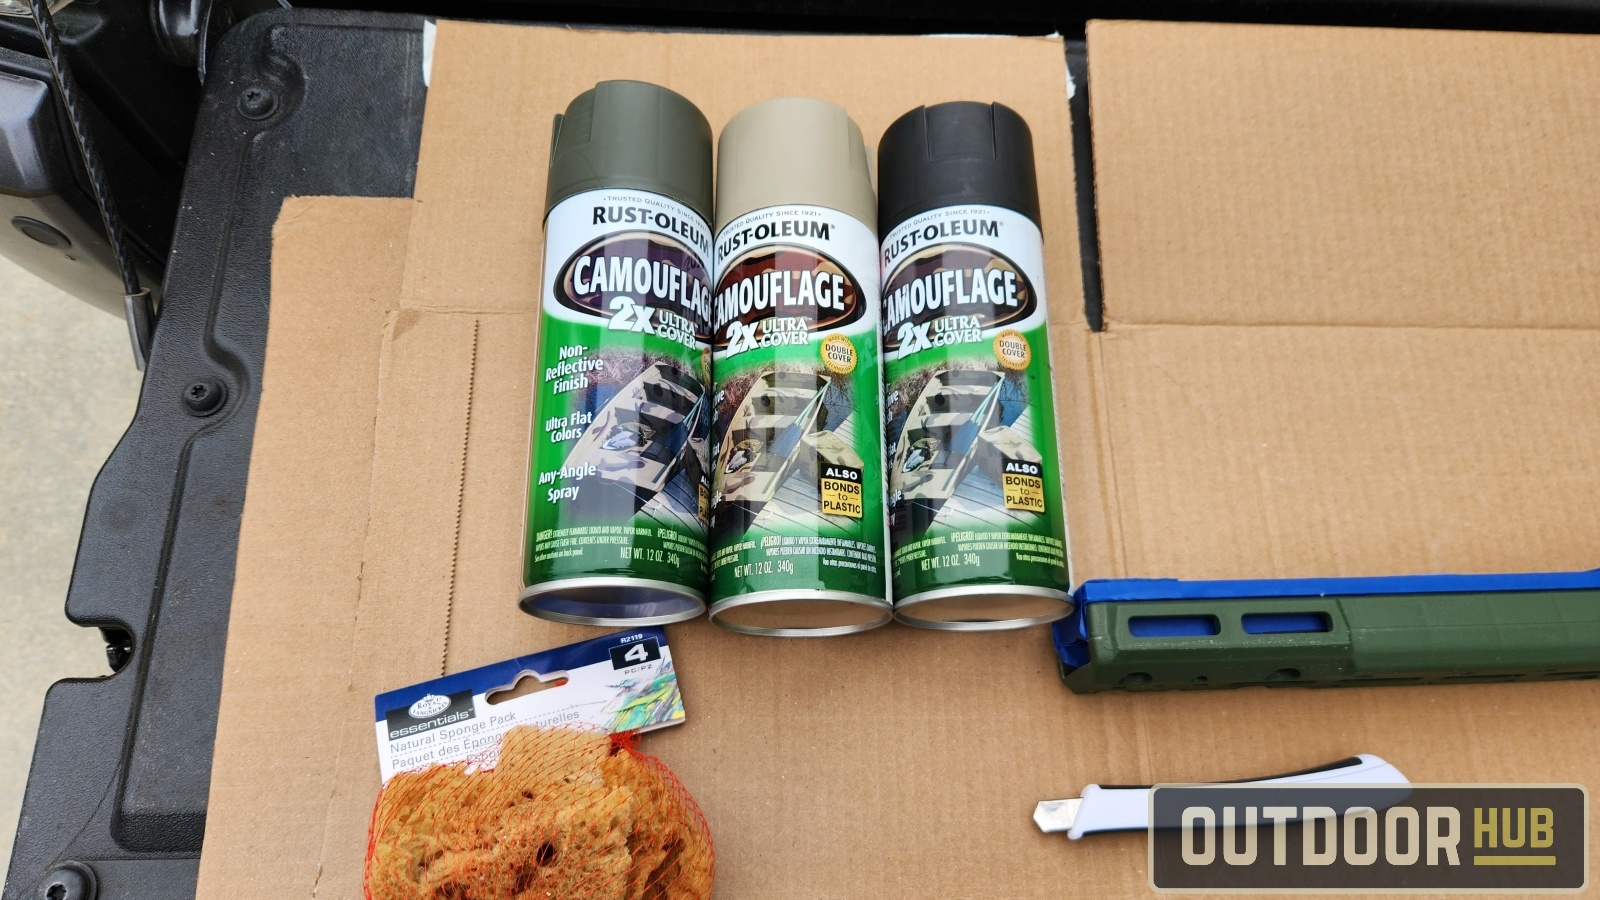
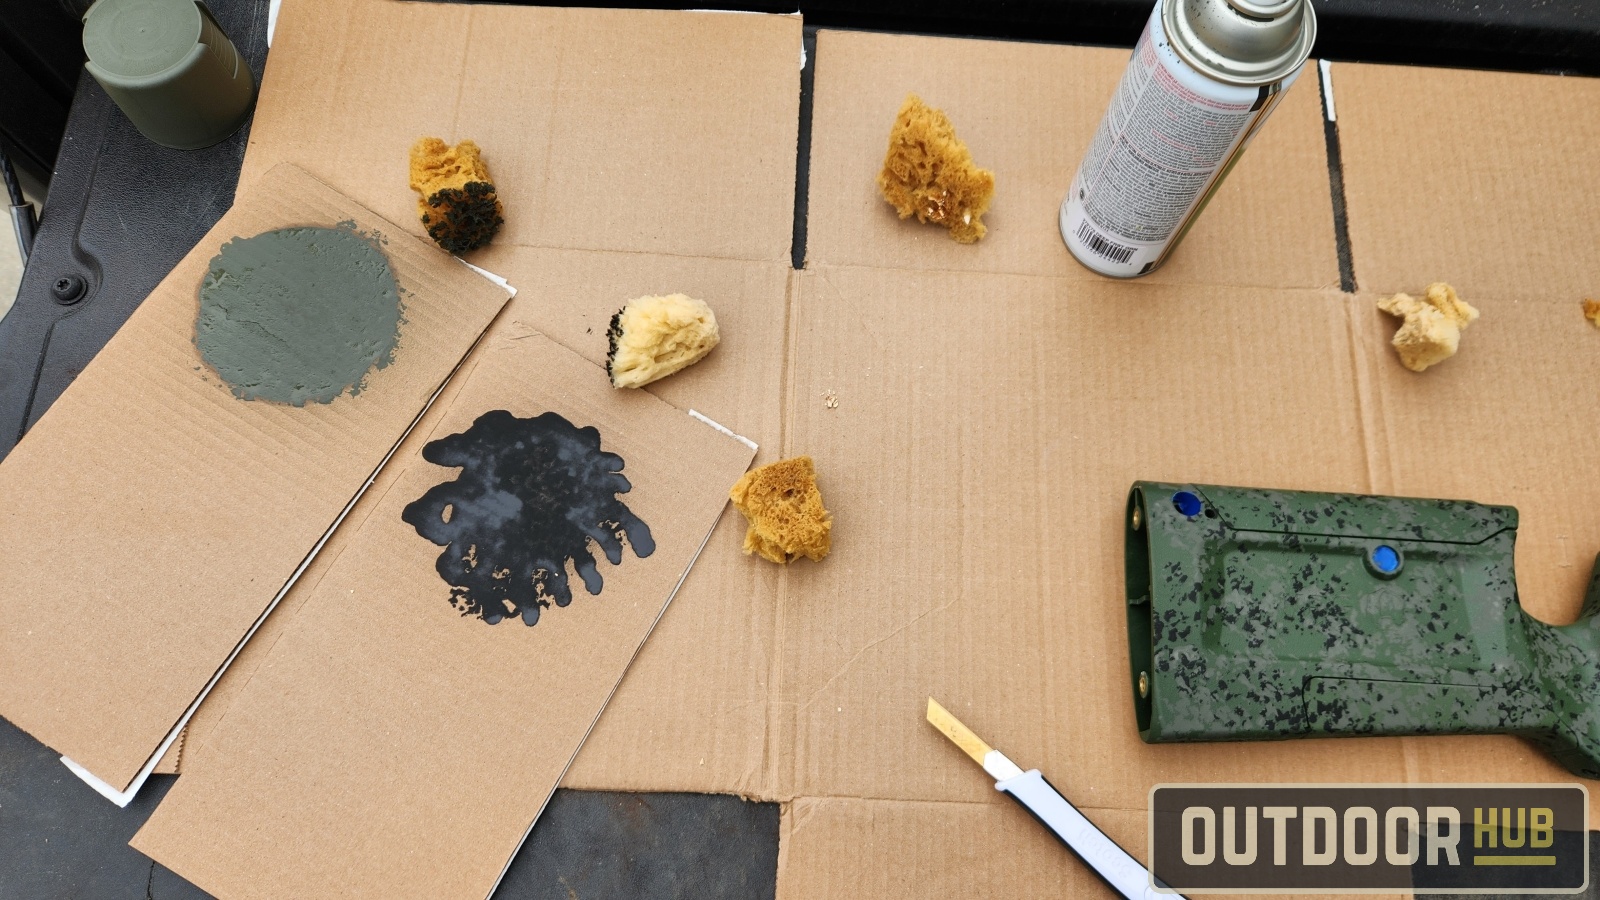
Pick the colors that work best for your area, or just whatever you like to look at. It’s all up to your personal preference on color selection. I chose what I thought would look nice while still being somewhat functional in the South East US. For paint brand selection I recommend the Rust-Oleum brand camo paints I’ve used the Krylon camo paints before and had issues with it not adhering properly coming off as dust. For the sponges, you want to use natural sea sponge pieces this gives you varied textures for a better look. Walmart has a little baggy of them for around $5 in their arts and crafts section.
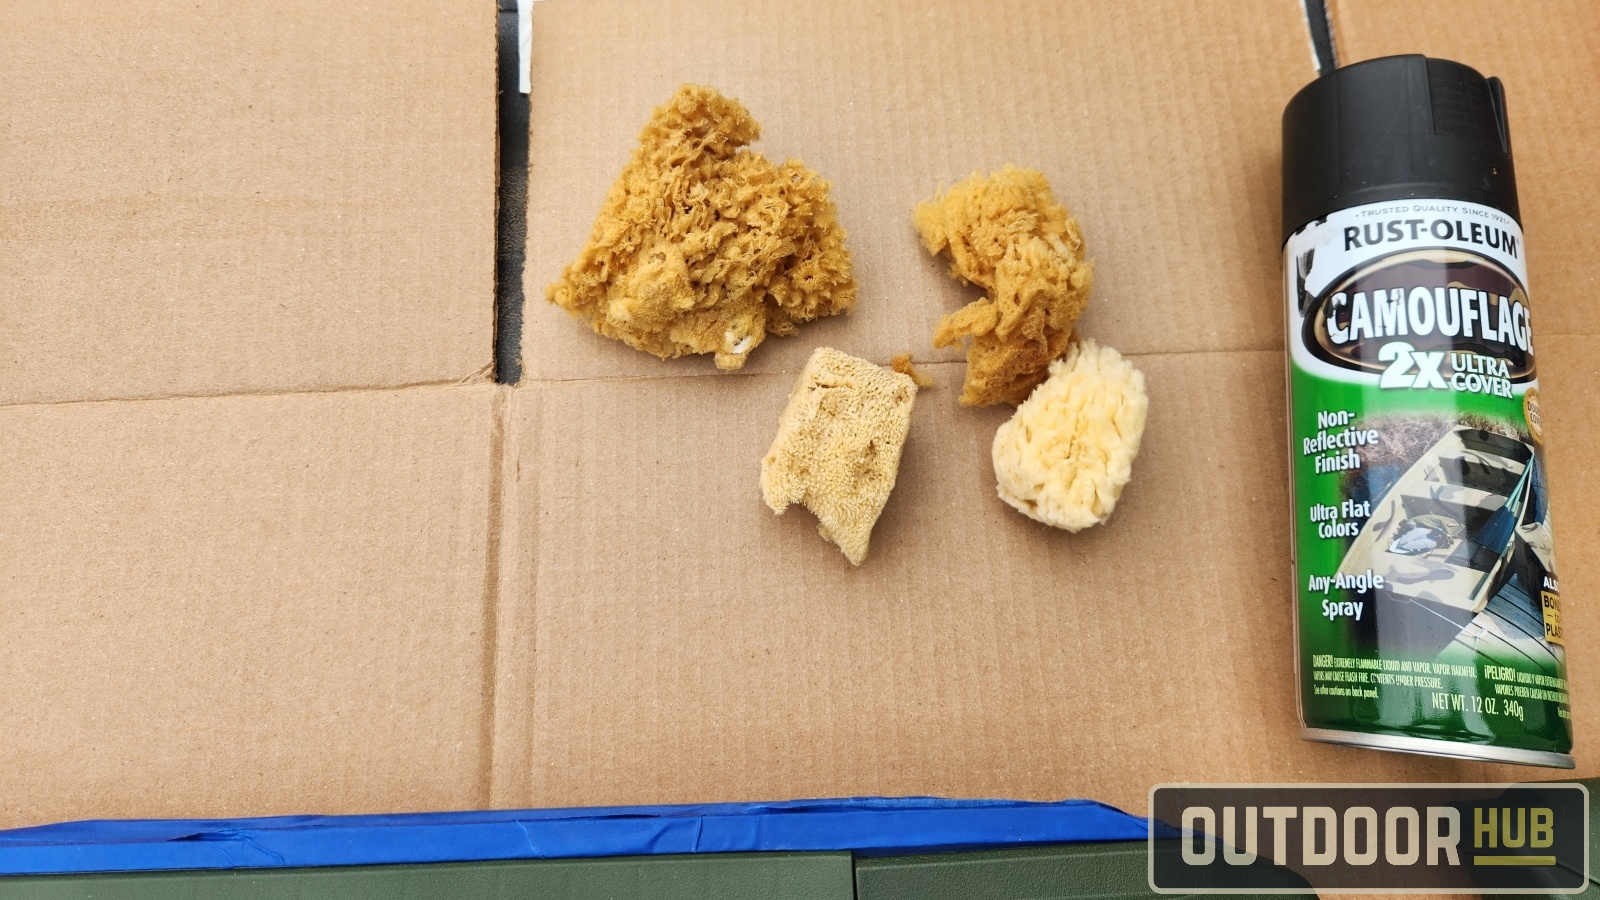
I like going from darkest to lightest in paint colors, so the flat black was the first to go down. The method for sponge painting camo patterns on the stock is this. Get a piece of cardboard or a paper plate and spray a puddle of the paint on it. Then take the piece of sponge you like dip it a bit into the paint and start dabbing it onto the rifle stock. Try to avoid wiping or smearing it and just go with the flow. Just do what feels right to you. If you don’t like it you can always hide it under other layers, just treat them as happy little accidents.
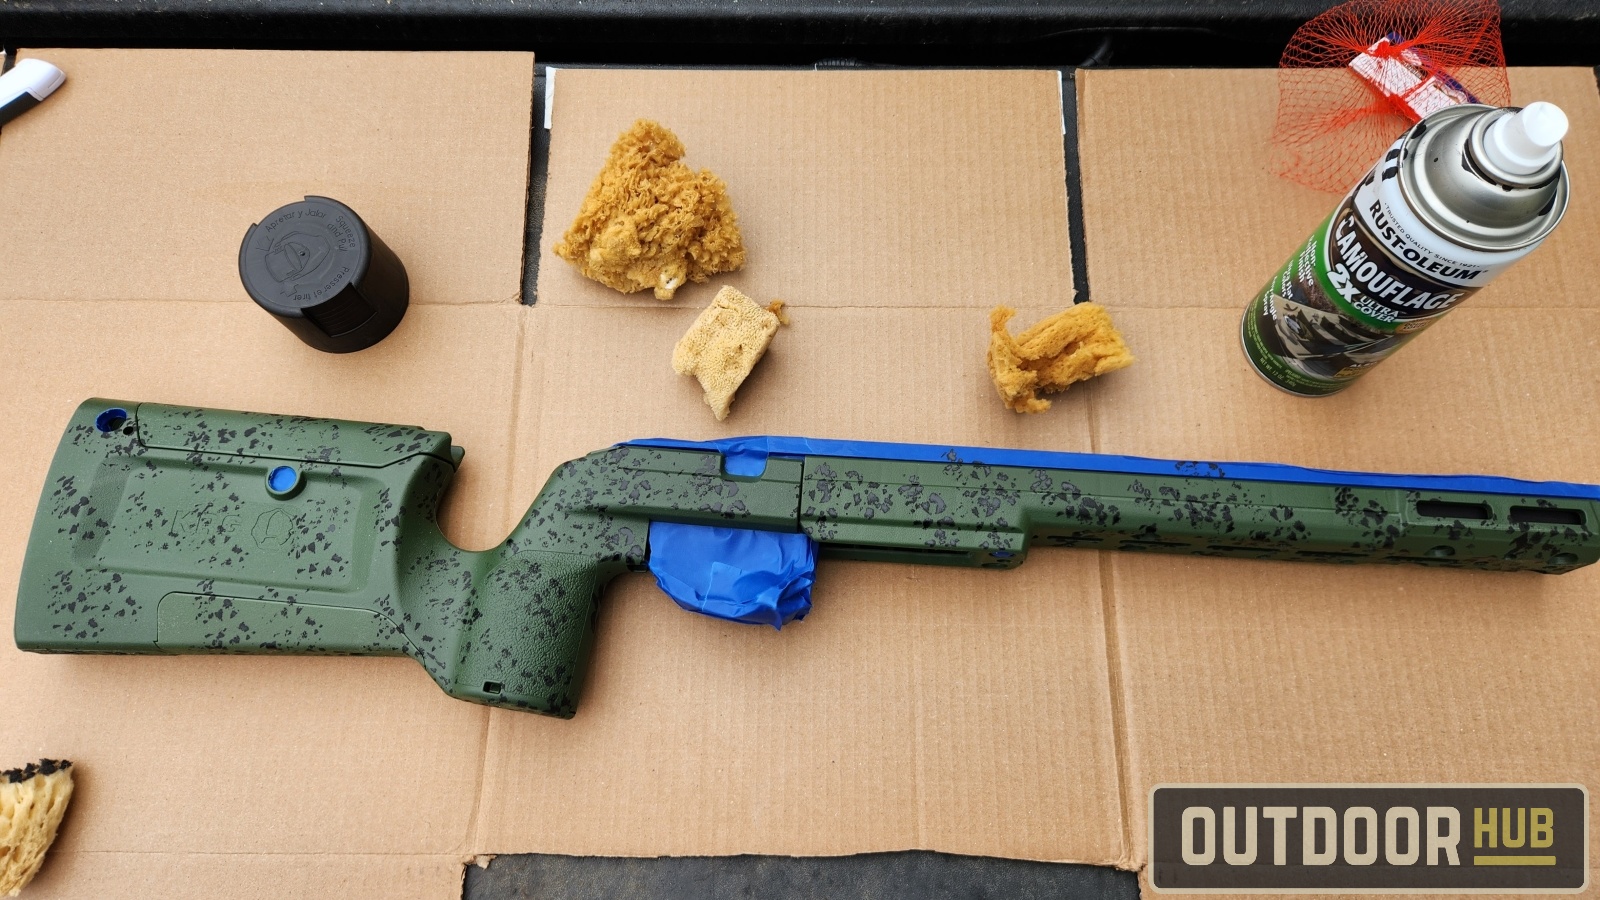
Once you get the first color down how you like on the rifle stock, let the solvent in the paint flash off before moving to the next color. You can use a hair dryer to speed that up, just don’t go crazy with it. If you get it too hot you can burn the paint and it won’t cure properly. Once that first layer is dry to the touch, pick your next color and next piece of sea sponge and repeat the steps from before. Just go with what you think looks good, no right and wrong here. Follow the same steps with all your colors, and if you end up not liking something just go back a step and reblot over it with another color. Once you reach a look you’re happy with let the paint dry and cure.
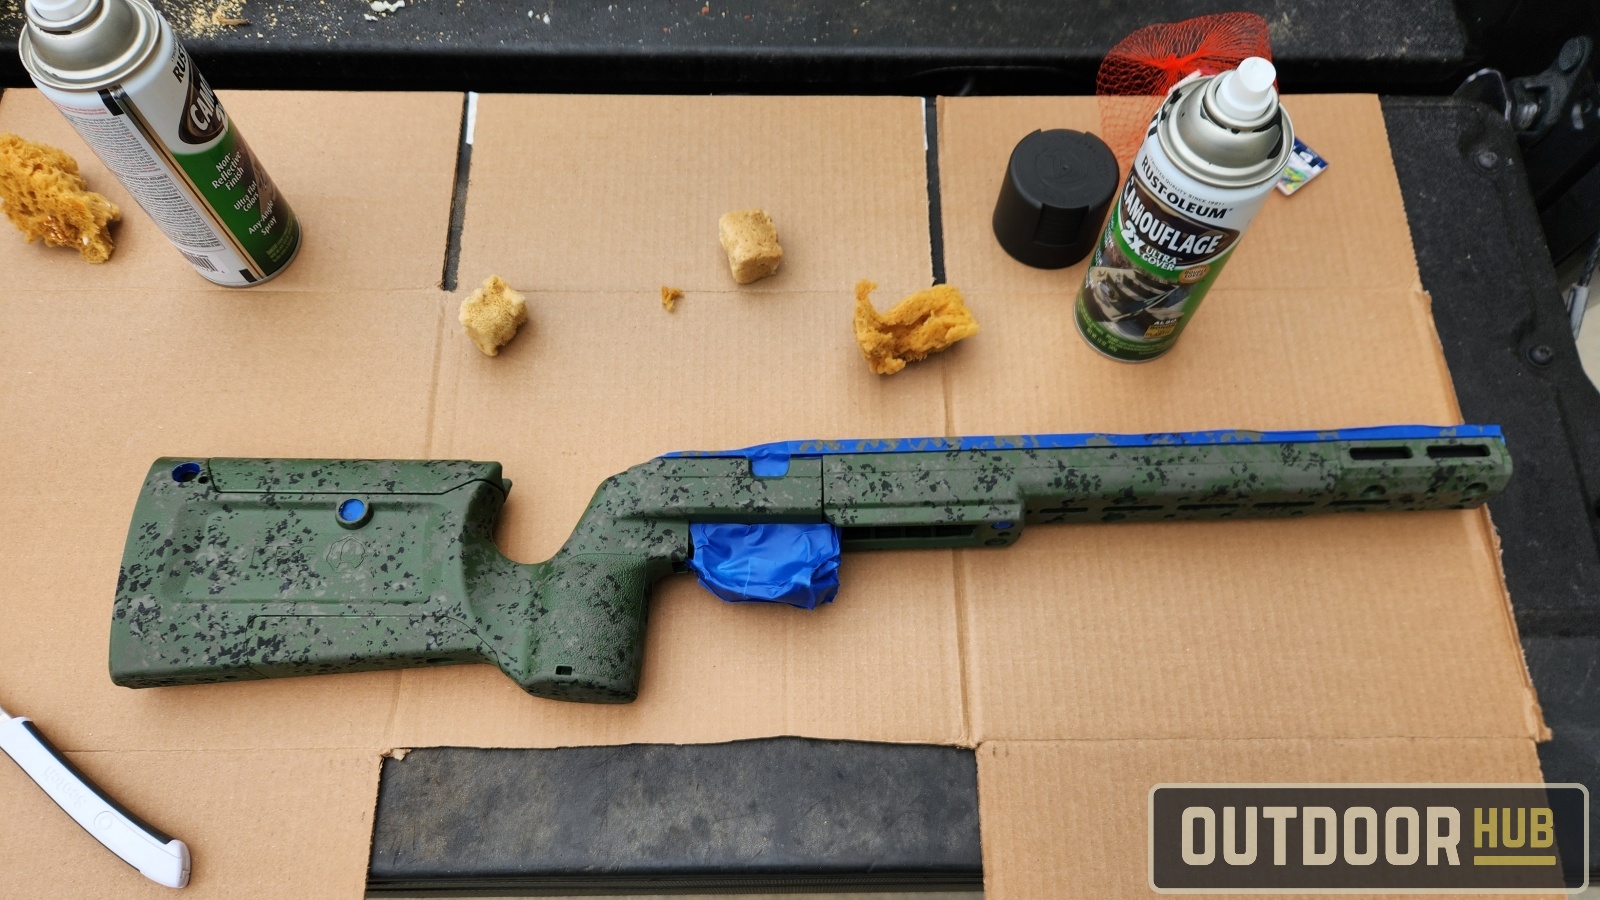
You want to hang the rifle stock up somewhere so the paint isn’t touching anything really while curing. I recommend setting up a hanger like I did here with a recoil pad screw, some wire, and a carabiner. I got a ladder and clipped the rifle stock onto it and then hit it with a hair dryer to warm up the paint and rifle stock. If done right the heat will help cure the paint, but again not too much because you can burn it and it will flake off easily later. At this point, you can apply a layer of matte clear coat if you want or just leave the surface raw so it will wear over time.
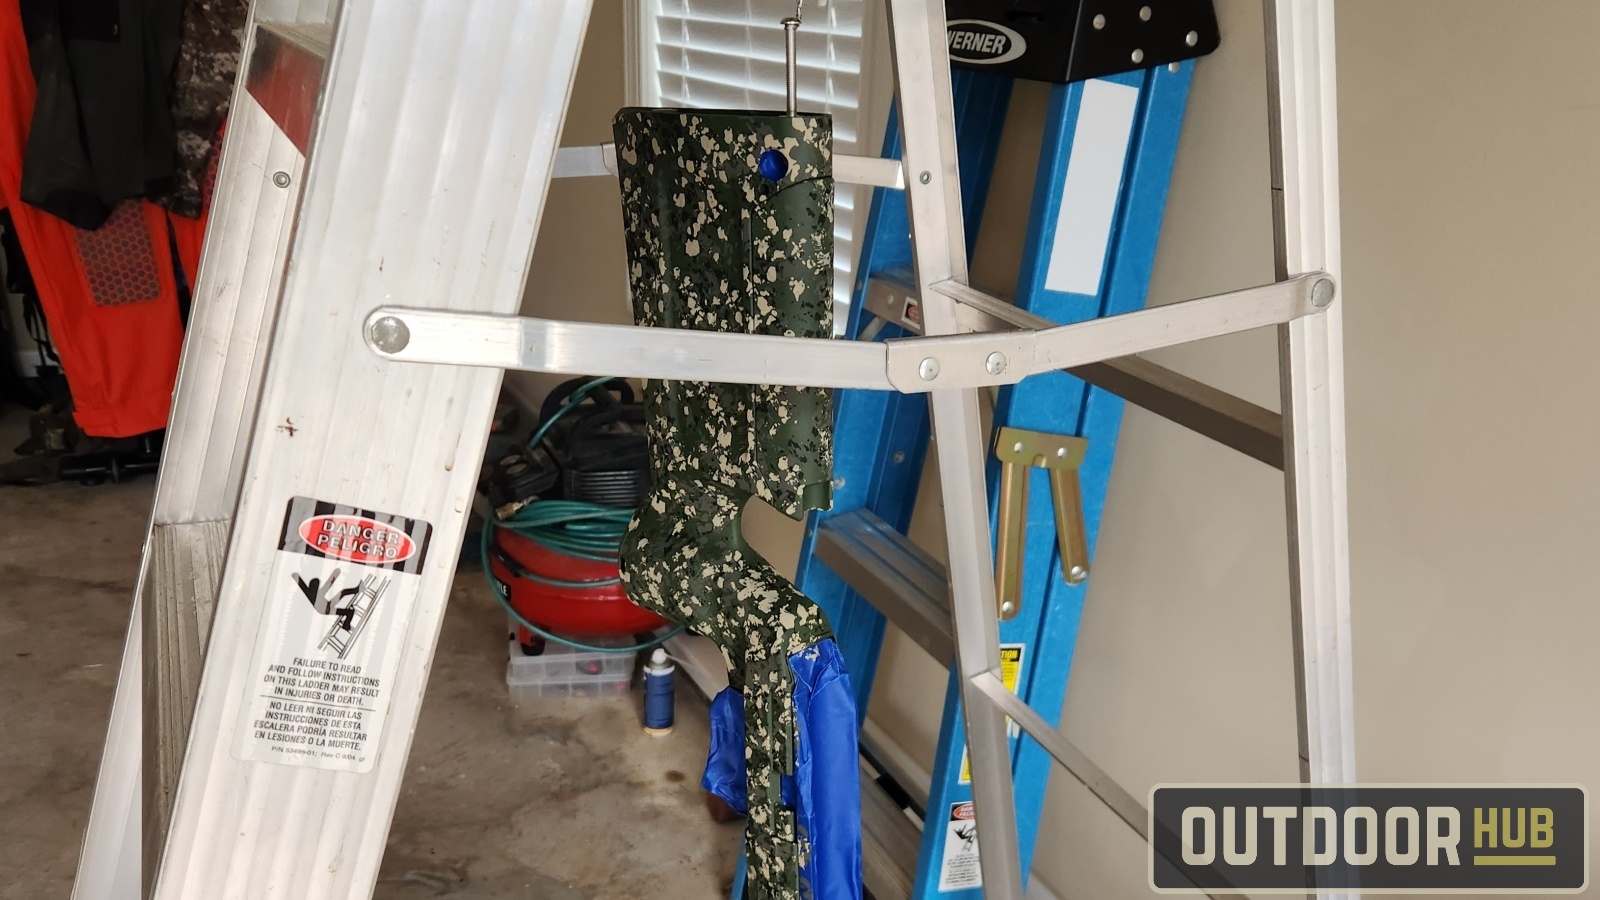
Whichever direction you go with, let the stock sit for at least 4 hours without handling. After that, you can start taking off the tape and start reinstalling everything. But don’t be rough with it for a couple of days, the paint will need a bit more time. If you can still smell fumes give it some more time before taking it out.